Top Horse Class Rankings in Dead Rails
Author : Violet
May 03,2025
Are you eager to explore the vast landscapes of *Dead Sails* without meeting an untimely end? You're not alone! Besides the gear you acquire and the companions you choose, selecting the right class is crucial for survival. To save you from endless trial-and-error, I've crafted the **ultimate *Dead Rails* class tier list**. Let's dive in and see which classes will help you reach those enviable distances without the hassle.
Recommended Videos
Table of contents
- All Dead Rails Class Tier List
- S Tier Dead Rails Classes
- A Tier Dead Rails Classes
- B Tier Dead Rails Classes
- C Tier Dead Rails Classes
- D Tier Dead Rails Classes
All Dead Rails Class Tier List
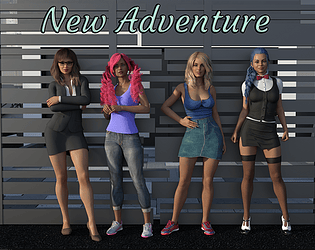
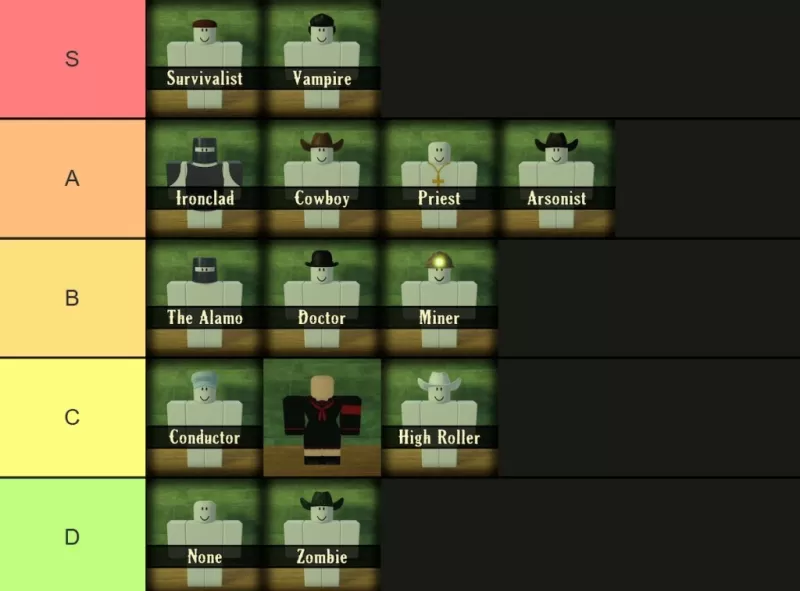 Image by Destructoid
This Dead Rails class tier list might stir some controversy, but it's designed to guide you effectively. The Vampire remains a top choice even after numerous updates, while the Survivalist has seen a significant rise in popularity. However, the Zombie class still disappoints, unable to consume Snake Oil for healing. Keep in mind, while this list focuses on individual class strengths, teamwork also plays a role, though it's considered to a lesser extent. Remember, the ultimate goal is to enjoy the game with friends, not just to min-max your stats.
S Tier Dead Rails Classes
 Screenshot by Destructoid
When it comes to sheer damage output, the Survivalist and Vampire stand unrivaled at the top of the Dead Rails class tier list. Although the Ironclad is a strong contender, these two classes dominate the S tier:
| **Name** | **Cost** | **Info** |
| Survivalist | 75 | The Survivalist starts with a Tomahawk and becomes increasingly deadly as your health decreases. Even at full health, you deal more damage than most classes, though this advantage might be nerfed soon. This class excels against tough enemies that are hard to take down, delivering a punch that few other classes can match. |
| Vampire | 75 | The Vampire thrives on speed and aggression. You move faster than a horse or sprinting zombie, and your melee attacks are devastating—most zombies fall in just three hits. However, you must avoid sunlight, sticking to shadows for safety. The Vampire Knife you spawn with heals you with each successful hit, making survival all about maintaining constant pressure. |
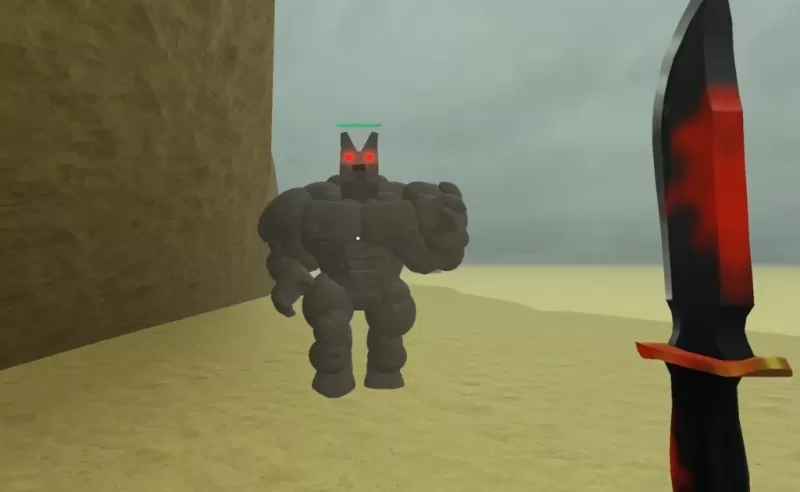
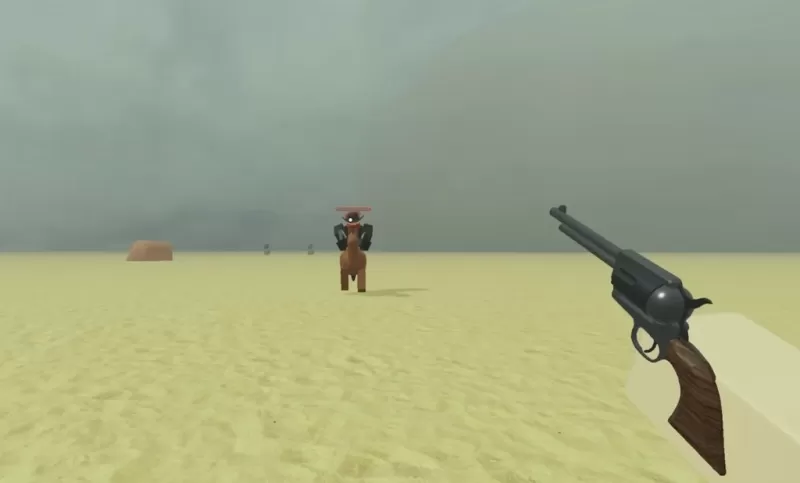
A Tier Dead Rails Classes
 Screenshot by Destructoid
The A tier of the Dead Rails class tier list includes classes that are still excellent but not as robust in solo survival scenarios. They offer solid damage and starting gear, though they may struggle more when playing alone. In my opinion, the Ironclad has the most potential:
| **Name** | **Cost** | **Info** |
| Ironclad | 100 | The Ironclad comes fully armored, making you significantly harder to kill, though at the cost of being 10% slower. This class isn't ideal for solo play but shines in team settings, especially with shotguns for close-quarters combat. Ensure you have teammates to cover your back. |
| Cowboy | 50 | The Cowboy starts strong with a revolver, ample ammo, and a horse, making early-game encounters easier and providing speed for survival during chaotic moments like Blood Moon nights. With the Game Pass, you can sell the revolver for extra cash to start with an even better loadout. It's a cost-effective choice. |
| Priest | 75 | The Priest wields Crucifixes and Holy Water, which are powerful against enemies but cannot be sold. You're immune to lightning, making storms irrelevant. While not suited for solo play, the Priest is invaluable in larger groups, providing crucial support with their throwables. |
| Arsonist | 20 | The Arsonist excels in chaos, equipped with Molotovs and enhanced fire damage, perfect for quickly clearing groups of enemies or towns. This class works best in confined spaces where you can control the pace, and a horse significantly boosts your hit-and-run strategy. |
B Tier Dead Rails Classes
 Screenshot by Destructoid
Classes in the B tier of the Dead Rails class tier list are specialists, shining in specific contexts. The Doctor, for example, offers great value at a low price and is invaluable for support, but not for dealing damage. All three classes here are crucial in group settings:
| **Name** | **Cost** | **Info** |
| The Alamo | 50 | The Alamo is designed for defense, starting with Sheet Metal, Barbed Wire, and a helmet, perfect for fortifying the Train early on. This class excels at holding the line and slowing down enemy waves, making it essential when the pressure is high. |
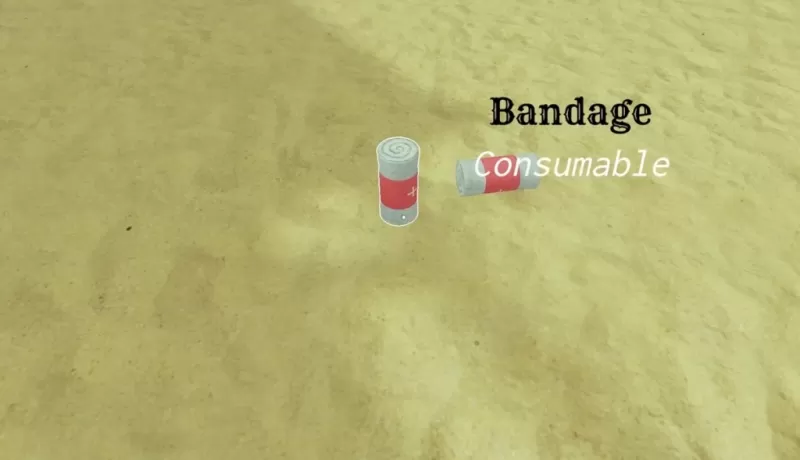
| Doctor | 15 | The Doctor is your go-to for emergency healing and reviving teammates, though it costs half your health to do so. With one of the lowest prices (tied with the Miner), this class is invaluable in group play. Keep the Doctor safe, as they can turn a potential wipe into a victory. Selling bandages and snake oil can net you a $40 boost. |
| Miner | 15 | The Miner is ideal for resource gathering and nighttime exploration, equipped with a helmet that provides light and a Pickaxe that breaks ore in two swings. They come with Coal to get you started. While not combat-focused, their utility is unmatched among the cheaper classes. |
C Tier Dead Rails Classes
 Screenshot by Destructoid
The C tier of the Dead Rails class tier list features classes with good utility but limited solo value. The Conductor is almost essential in a full team, while the Horse class offers a unique, albeit humorous, gameplay experience:
| **Name** | **Cost** | **Info** |
| Conductor | 50 | The Conductor controls the Train, starting with Coal and able to reach a top speed of 84, crucial for quick escapes. However, they lack a melee weapon at spawn, making them vulnerable initially. Ensure they are protected, as they keep the team moving. They no longer suffer a health penalty, making them slightly less fragile. |
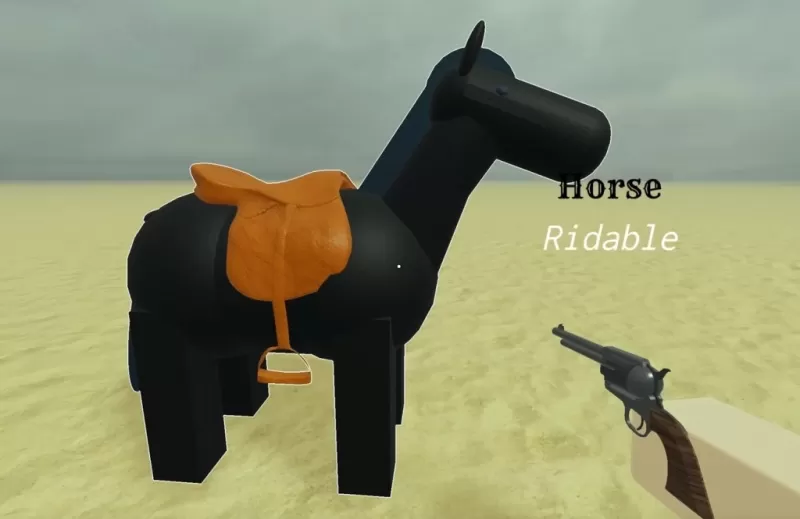
| Horse | Unlockable through the Horsing Around gamemode | The Horse Class transforms you into a horse, unlocked during the 2025 April Fools "Horsing Around" event. With standard horse stats—32 studs per second speed, no passive healing, and a large hitbox—navigating tight spaces can be challenging. You can saddle up on players but not on the train or other horses. |
| High Roller | 50 | The High Roller earns 1.5x the money from bags, providing a quick cash boost for early gearing. However, this also makes you more susceptible to lightning strikes during storms. It's a high-risk, high-reward choice, perfect for those willing to live dangerously. |
D Tier Dead Rails Classes
 Screenshot by Destructoid
At the bottom of the Dead Rails class tier list, the D tier includes classes that either offer little or struggle significantly. The None class is perfect for beginners, while the Zombie class is currently underperforming:
| **Name** | **Cost** | **Info** |
| None | Free | The None class is the default, providing no perks or drawbacks, just a shovel and whatever you scavenge. It's ideal for saving up bonds and learning the game before committing to a class, making it a great choice for beginners. |
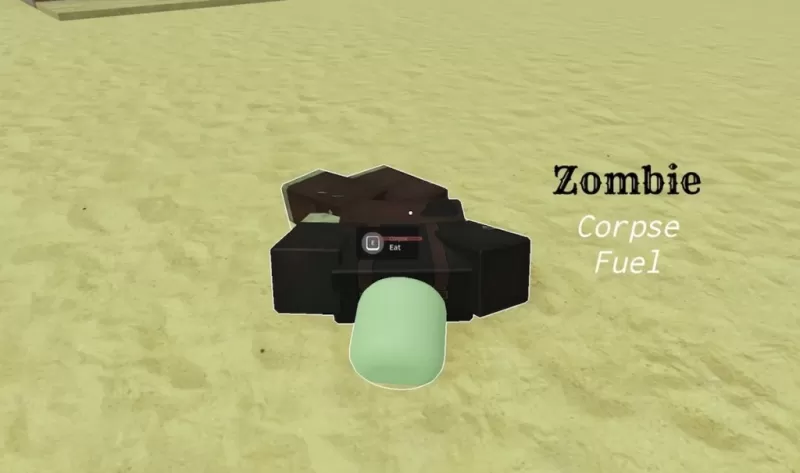
| Zombie | 75 | The Zombie class heals by feeding on corpses and can slip past enemies easily. However, without access to Bandages or Snake Oil, it struggles to sustain itself, making it currently one of the least effective classes. |
That's it for my Dead Rails class tier list! Use this guide to break records and conquer mobs with ease. Don't forget to check out Dead Rails codes and learn about Dead Rails challenges. Stay tuned for future updates that might shake up the meta!
Latest Articles
PUBG Mobile kicks off Friend Fest event and busts a Guinness World Record in the process
Fortnite has achieved a Guinness World Record, but not for what you might expectThis is part of the hybrid Friend Fest event happening until February 16thJoin Fortnite now to take part, or look for events near youFortnite, the mobile version of the p
Lego's $1,000 Star Wars Death Star Emerges in Leak
Leaked images seem to confirm a massive new LEGO Death Star set, rumored to contain 9,023 pieces, cost $1,000, and release this October.Instead of presenting the full spherical battle station, this version offers a cross-section view to highlight the
GTA 6 Excludes PC at Launch
Take-Two Interactive CEO Strauss Zelnick discussed the company's strategy for launching games across multiple platforms, with Grand Theft Auto VI being the primary focus. He acknowledged that delaying the PC version of GTA 6 will likely mean forgoing
Candyland Update Unveils Sweet New Level for Human Fall Flat Mobile
Human Fall Flat Mobile introduces a delightful new level, Candyland, available today on Android and iOS. It’s accessible via Google Play Pass, with Apple Arcade support coming soon, and marks its debu
Stumble Guys Launches 4v4 Custom Map Mode
Stumble Guys marks its first anniversary on consoles with thrilling festivities beyond just platforms. Expect explosive rockets, vibrant neon lights, and exciting new gameplay elements! Scopely's latest update introduces a brand-new 4v4 team mode to
Pokémon TCG Prismatic Evolutions Back on Amazon
Amazon has restocked Pokémon TCG: Prismatic Evolutions Surprise Boxes today at $59.99. The burning question remains - is this premium price justified?The TCG community remains divided between MSRP purists ($22.99) and collectors willing to pay "marke
Latest Games


Lovely Plants
Simulation丨53.9 MB

Train Simulator
Simulation丨180.6 MB
The Visitor (OLD)
Action丨17.70M
Xóc dĩa Offline
Card丨14.20M

Color Roll 3D
Puzzle丨151.13M

Journal of a Saint mod
Casual丨834.30M

Let's Bowl 2: Bowling Game
Sports丨66.20M

TradingCardsMon
Casual丨65.70M
Trending Games
MORE +


Top News
MORE +

01
12-10
Civilization's Rebirth: Pre-Register for After Inc
Ndemic Creations, the studio behind the acclaimed Plague Inc., is launching a new game: After Inc. This game shifts the focus from unleashing devastating plagues to the monumental task of rebuilding civilization after the Necroa Virus, the notoriously challenging undead-creating disease from Plague
02
01-21
Final Fantasy Updates Fix Controller Glitch
Patches for Final Fantasy VII Remake are now available on Steam, the Epic Games Store, and PlayStation 5. This update resolves issues with controller vibration motors. The game follows Cloud Strife, a former SOLDIER, as he joins Avalanche to prevent Shinra Electric Power Company from destroying th
03
04-18
"Jurassic World Rebirth Trailer Unveils Dinosaur Chaos Before Summer Release"
Jurassic World Rebirth made a roaring entrance during Super Bowl Sunday with a special trailer that showcased even more dinosaur action in anticipation of its July 2025 premiere. The latest footage features stars Scarlett Johansson and Mahershala Ali, who initially capture the audience's attention b
04
12-12
Immersive Adventure Awaits in 'In the Turquoise Moonglow' Update for Wuthering Waves
Wuthering Waves Version 1.2 Update: A Sneak Peek at "In the Turquoise Moonglow"
Get ready, Wuthering Waves players! Kuro Games is launching Phase One of the highly anticipated Version 1.2 update on August 15th. A new trailer reveals exciting additions, including a fresh Resonator, new weapons, ques
05
04-24
"Dune: Awakening Delay Extended by Three Weeks for Beta-Inspired Changes"
Dune: Awakening, the highly anticipated open-world survival MMO inspired by Frank Herbert's iconic sci-fi novels and Denis Villeneuve's films, has been pushed back to a new release date of June 10, 2025. Funcom, the game's developer, announced this delay alongside an exciting early access opportunit
Topics
More +