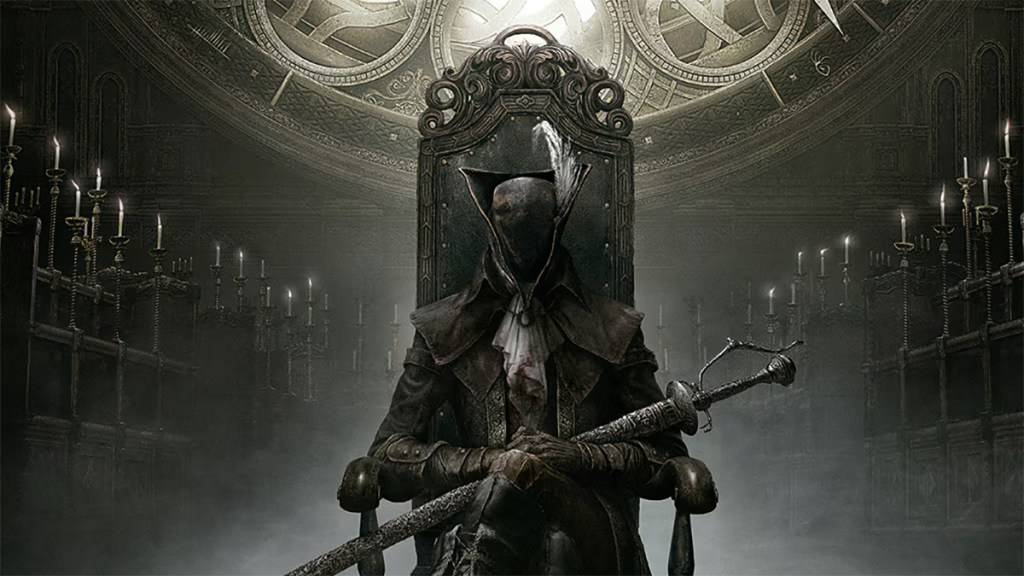
Optimal Bloodborne Boss Sequence Revealed
Author : Camila
Apr 03,2025
Navigating the challenging world of Bloodborne requires a strategic approach to its formidable bosses. This guide outlines the ideal boss order to enhance your gameplay experience and maximize rewards. Whether you're aiming to complete the main story or tackle every boss, including those from The Old Hunters DLC, this sequence will help you conquer Yharnam.
Table of Contents
- The Best Boss Order for Bloodborne
- Best Boss Order for Non-Optional Bosses in Bloodborne
- Best Boss Order for All Bosses in Bloodborne
- Our Best Boss Order, Explained
The Best Boss Order for Bloodborne
Bloodborne offers flexibility in boss encounters, with some being optional. Completing as many bosses as possible enriches your gameplay and rewards. Here, we provide two boss orders: one for non-optional bosses and a comprehensive list including all bosses and the DLC additions.
In total, there are 17 regular bosses and 5 DLC bosses. While the DLC can be started post-Vicar Amelia, it's advisable to tackle it near the game's end for a smoother experience.
Best Boss Order for Non-Optional Bosses in Bloodborne
- Father Gascoigne
- Vicar Amelia
- Shadow of Yharnam
- Rom, the Vacuous Spider
- The One Reborn
- Micolash, Host of the Nightmare
- Mergo’s Wet Nurse
- Gehrman, the First Hunter
- Moon Presence (Ending Specific)
Best Boss Order for All Bosses in Bloodborne
- Cleric Beast (Optional)
- Father Gascoigne
- Blood-Starved Beast (Optional)
- Vicar Amelia
- The Witch of Hemwick (Optional)
- Shadow of Yharnam
- Rom, the Vacuous Spider
- Darkbeast Paarl (Optional)
- The One Reborn
- Martyr Logarius (Optional)
- Amygdala (Optional)
- Celestial Emissary (Optional)
- Micolash, Host of the Nightmare
- Ludwig the Accursed/Holy Blade (DLC/Optional)
- Laurence, the First Vicar (DLC/Optional)
- Living Failures (DLC/Optional)
- Lady Maria of the Astral Clocktower (DLC/Optional)
- Orphan of Kos (DLC/Optional)
- Ebrietas, Daughter of the Cosmos (Optional)
- Mergo’s Wet Nurse
- Gehrman, the First Hunter
- Moon Presence (Ending Specific)
Our Best Boss Order, Explained
Cleric Beast (Optional)
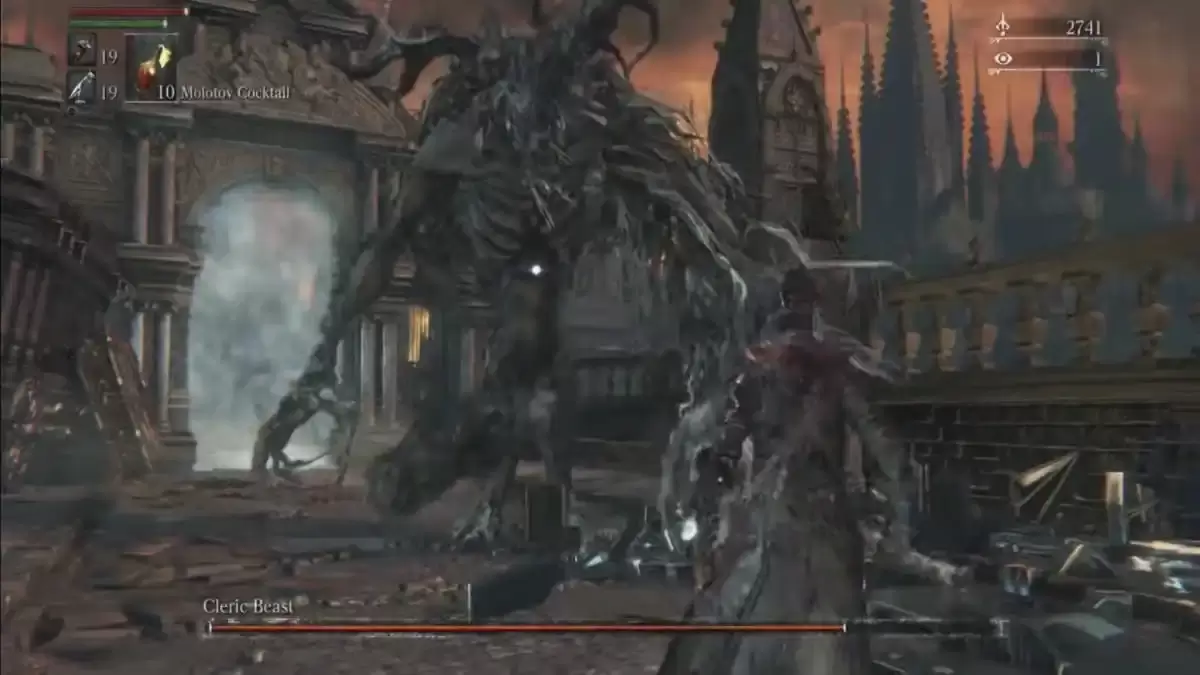 Image via FromSoftware
Area: Central Yharnam
The Cleric Beast is one of the first bosses you'll encounter, located in Central Yharnam. It's fast and aggressive, so focus on staying behind it to attack its hind legs, which can trip it up. Once downed, target its head for maximum damage.
Father Gascoigne
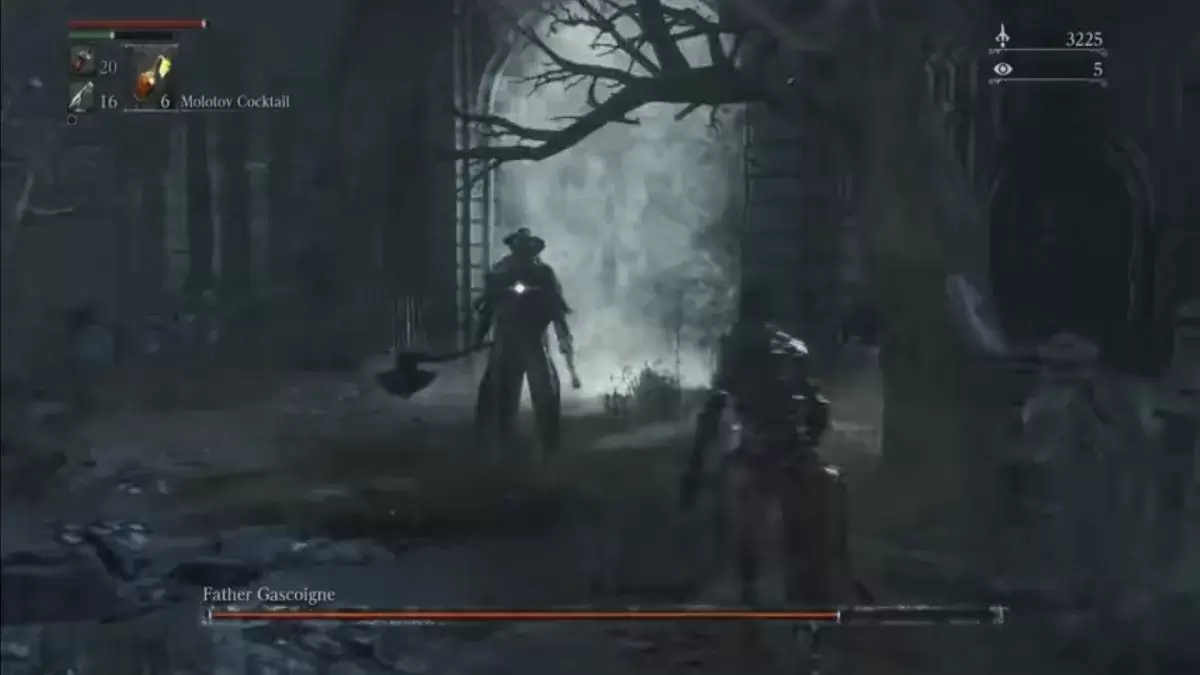 Image via FromSoftware
Area: Central Yharnam
Father Gascoigne, a crazed hunter, presents an early challenge. Mastering the parry timing is crucial to quickly defeating him as he moves swiftly and uses his gun frequently.
Blood-Starved Beast (Optional)
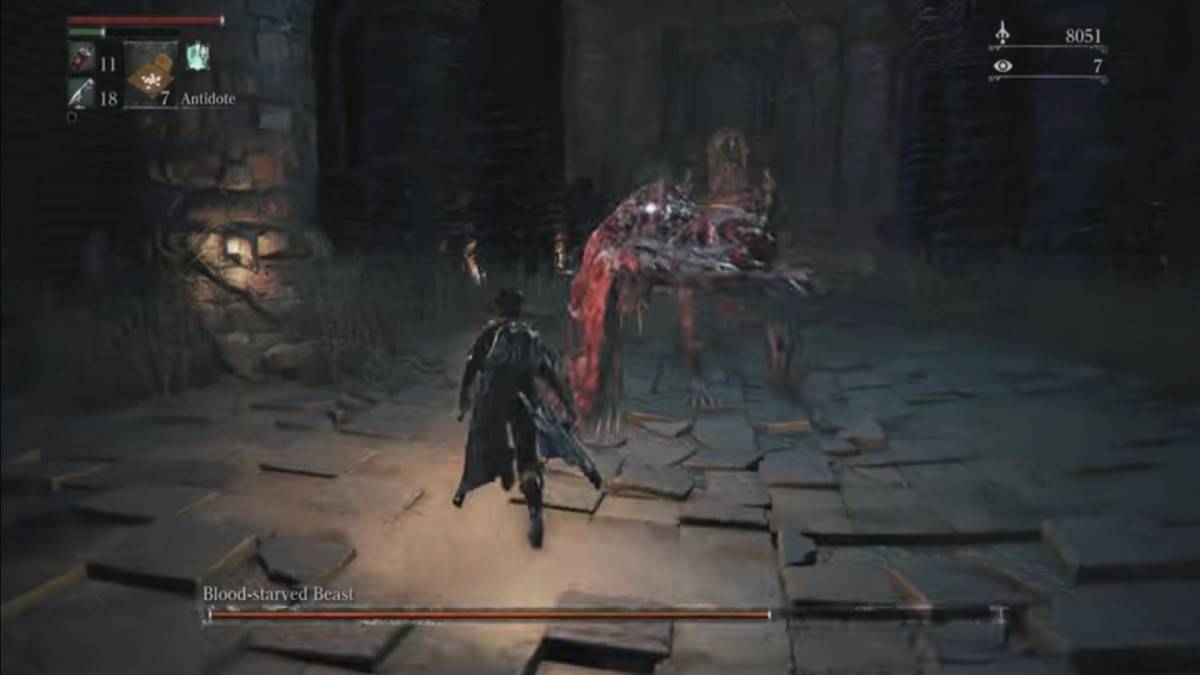 Image via FromSoftware
Area: Old Yharnam
Found in the Church of the Good Chalice in Old Yharnam, the Blood-Starved Beast is tough but manageable with distance and fire/explosive weapons.
Vicar Amelia
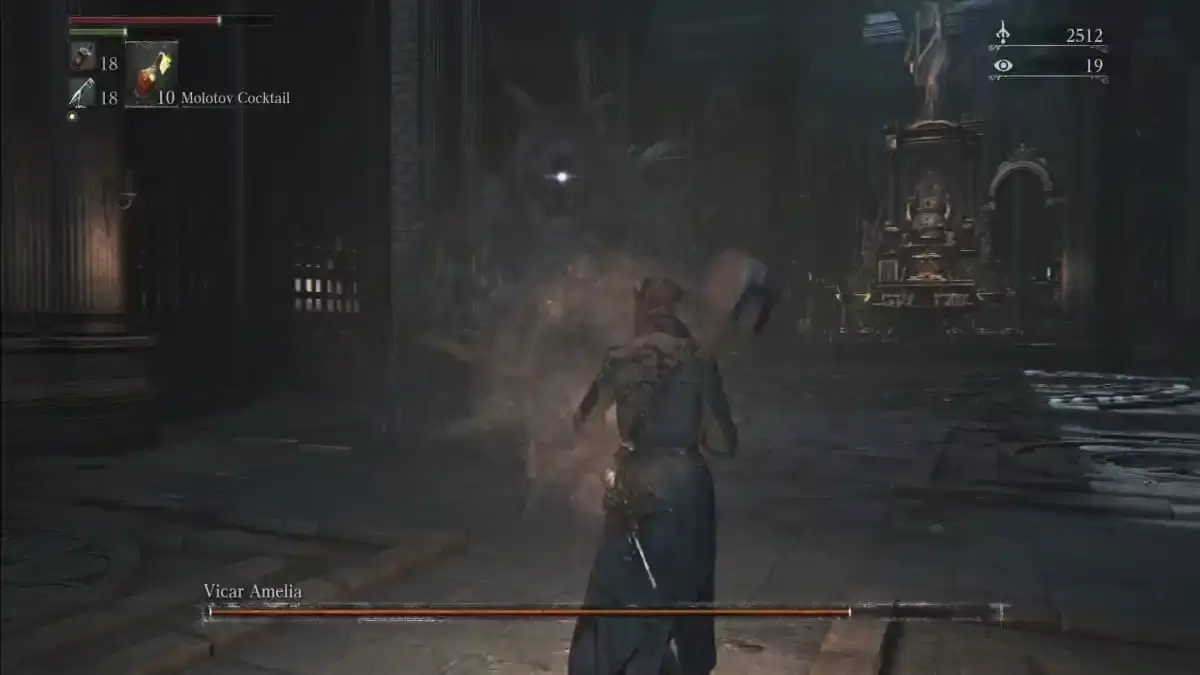 Image via FromSoftware
Area: Cathedral Ward
Vicar Amelia, a large beast with self-healing abilities, is vulnerable when healing. Attack her during this time but watch for her glow, signaling when she's healing.
The Witch of Hemwick (Optional)
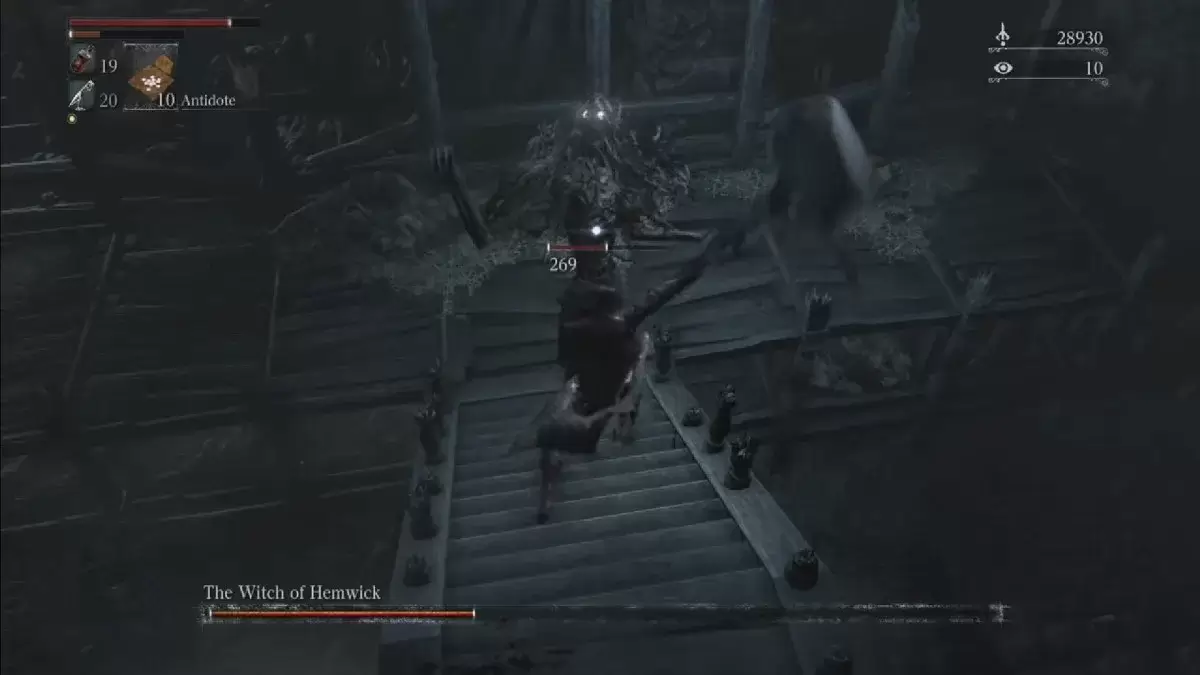 Image via FromSoftware
Area: Hemwick Charnel Lane
The Witch of Hemwick is tricky due to her invisibility at a distance. Approach her to reveal her position, especially in corners, and use your firearm to attack.
Shadow of Yharnam
 Image via FromSoftware
Area: Forbidden Woods
This boss wields a large club and can be defeated by dodging its swings, shooting its head with your gun, and slashing at its legs to expose its underbelly.
Rom, the Vacuous Spider
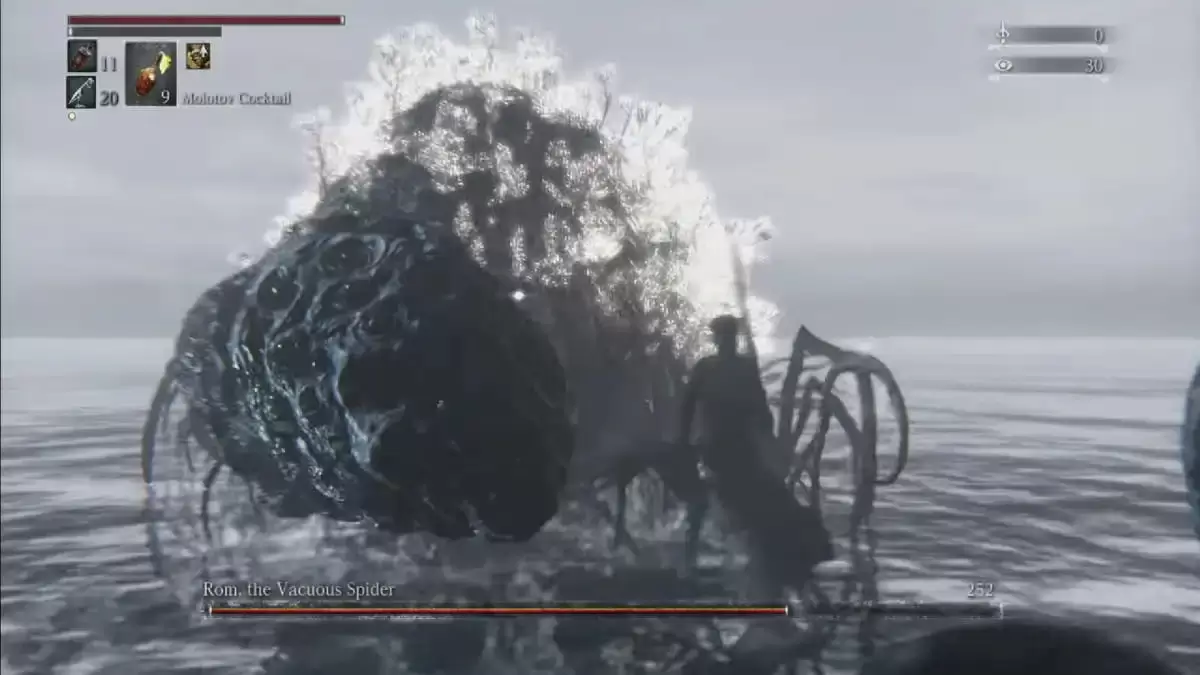 Image via FromSoftware
Area: Moonside Lake
Rom's poisonous and physical attacks, along with summoned spiders, require you to prioritize killing the spiders quickly before focusing on Rom. Beating Rom alters the game world, so ensure you've completed necessary tasks beforehand.
Darkbeast Paarl (Optional)
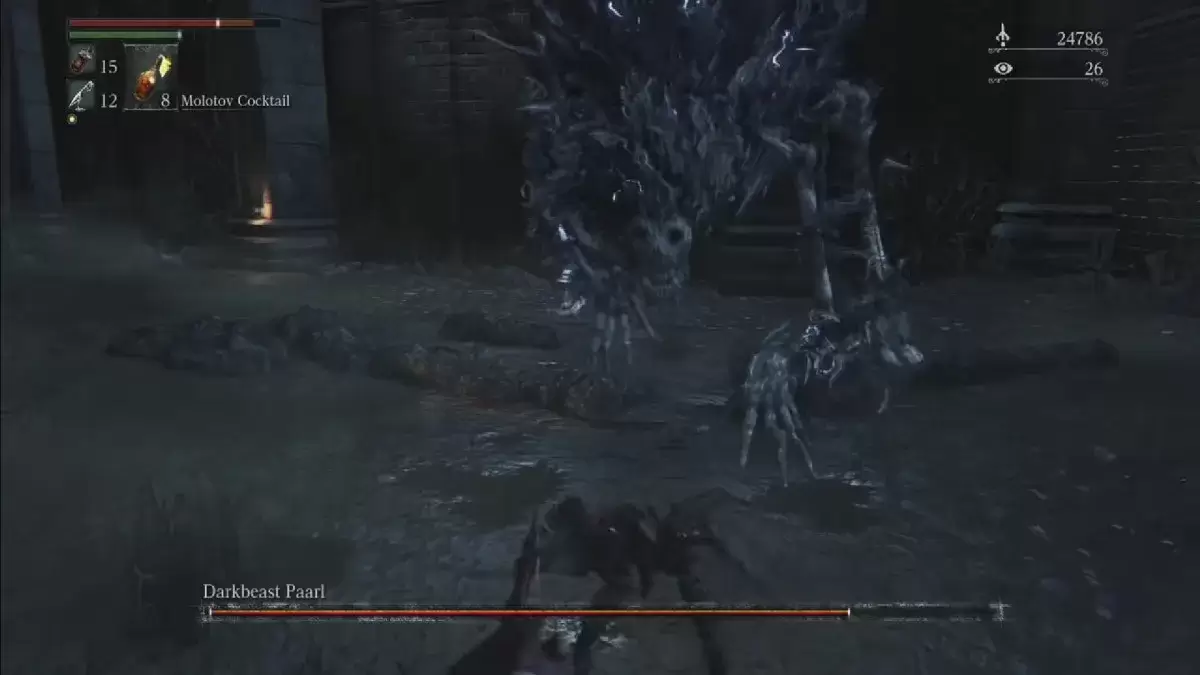 Image via FromSoftware
Area: Hypogean Gaol
Located in Yahar'gul, the Unseen Village, Darkbeast Paarl is recommended after Rom. This large creature requires careful timing to avoid its attacks.
The One Reborn
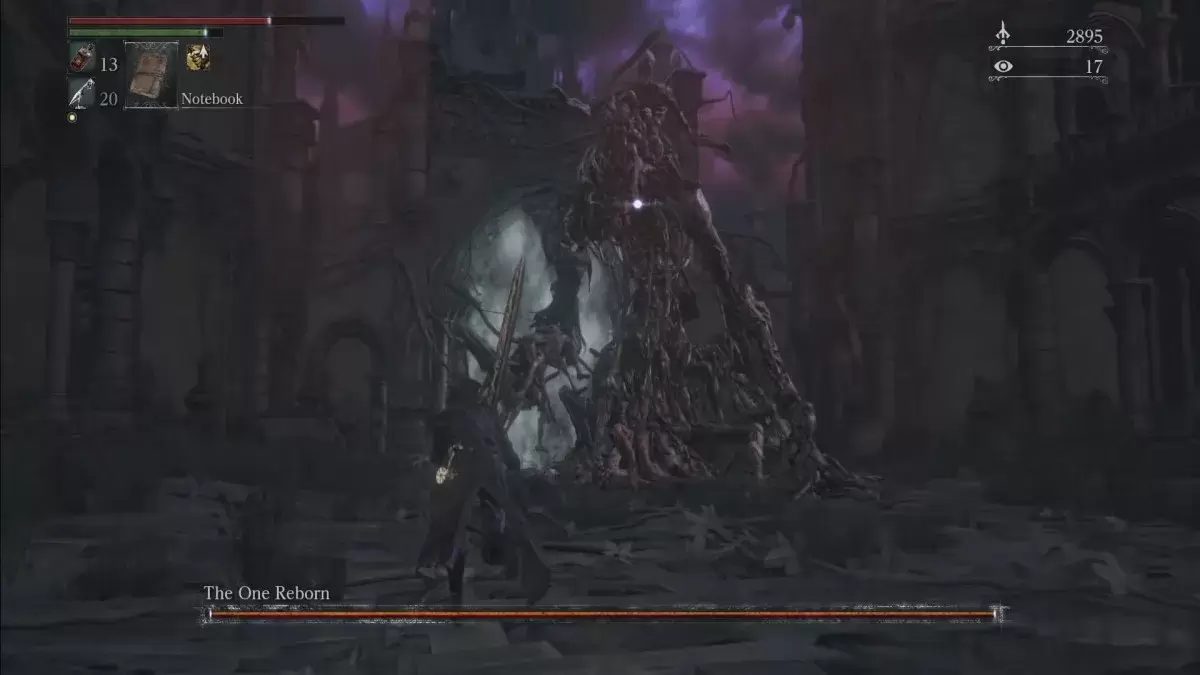 Image via FromSoftware
Area: Yahar’gul Unseen Village
The One Reborn uses physical and magical attacks. Keep your distance, roll to dodge, and attack when it's down. Manage the smaller enemies it summons.
Martyr Logarius (Optional)
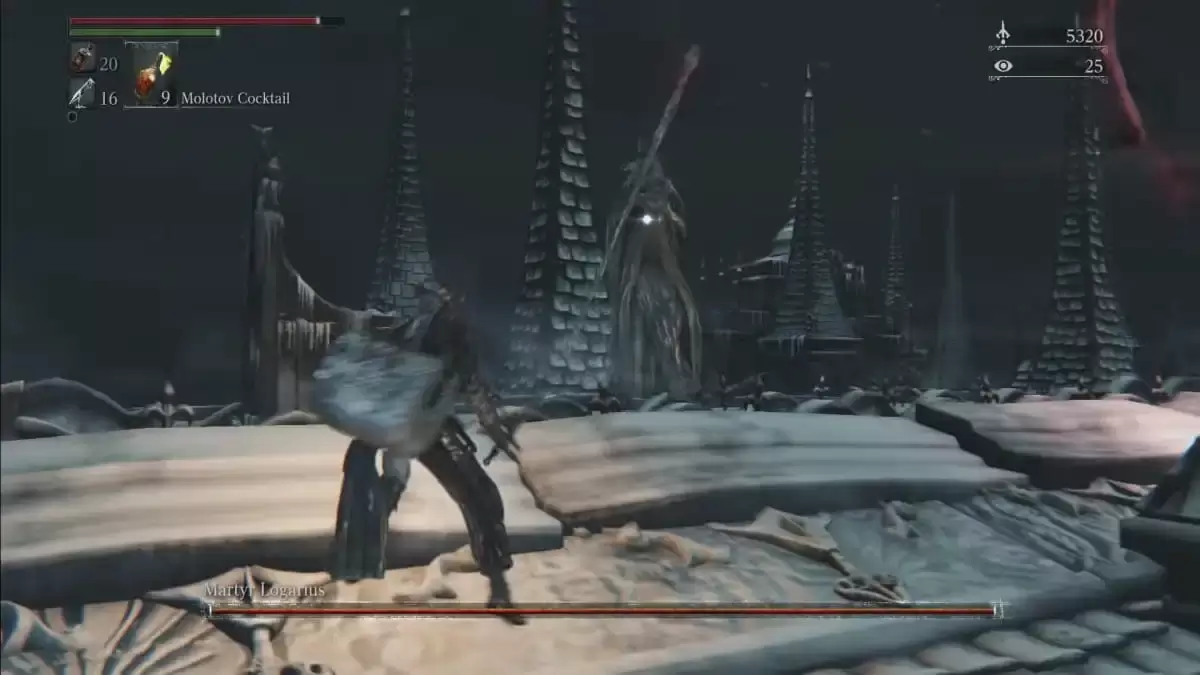 Image via FromSoftware
Area: Forsaken Castle Cainhurst
Martyr Logarius is challenging due to his Arcane damage. Parrying him effectively is key to dealing significant damage, though timing is crucial.
Amygdala (Optional)
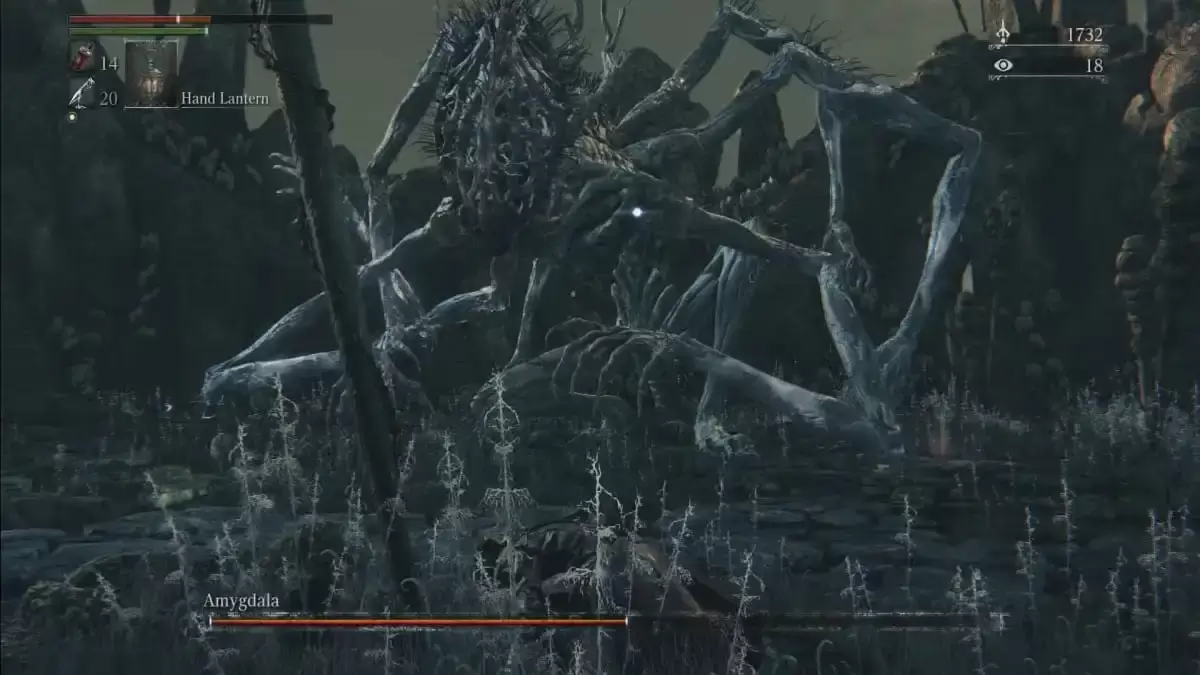 Image via FromSoftware
Area: Nightmare Frontier
Amygdala, a giant with tentacles, has a wide range of attacks. Her size and reach make this fight difficult, requiring careful maneuvering.
Celestial Emissary (Optional)
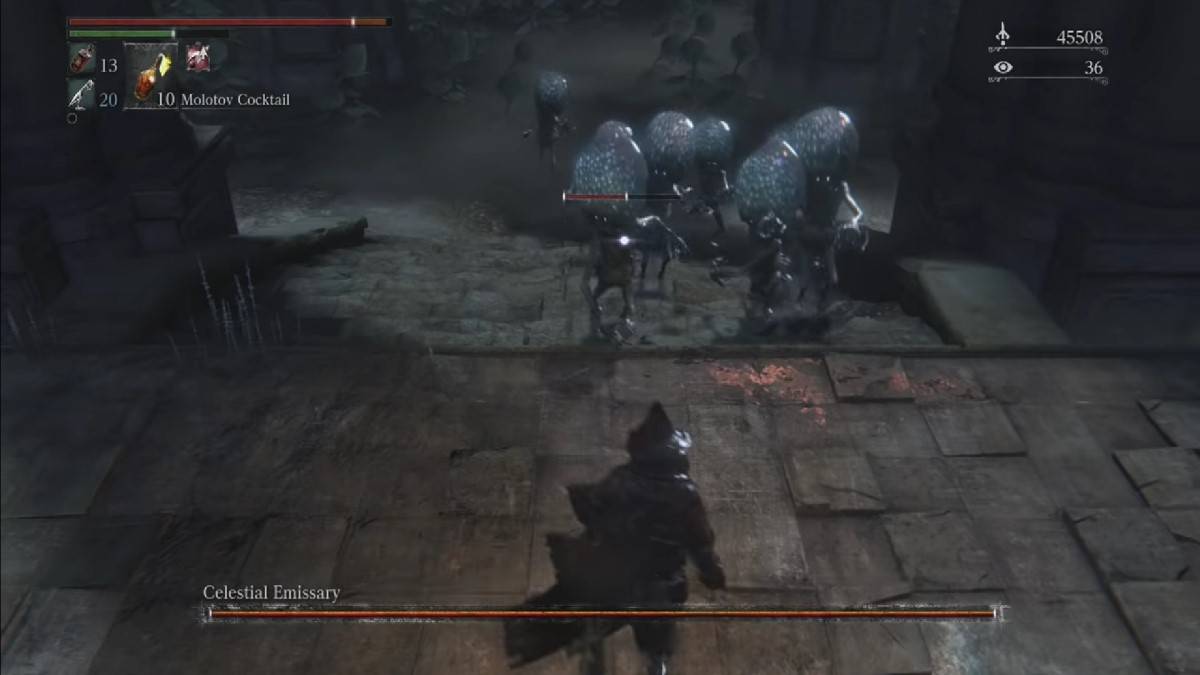 Image via FromSoftware
Area: Upper Cathedral Ward
The Celestial Emissary's fast movements and arm swings necessitate rolling towards its legs for safety. Be cautious of its grab attacks.
Micolash, Host of the Nightmare
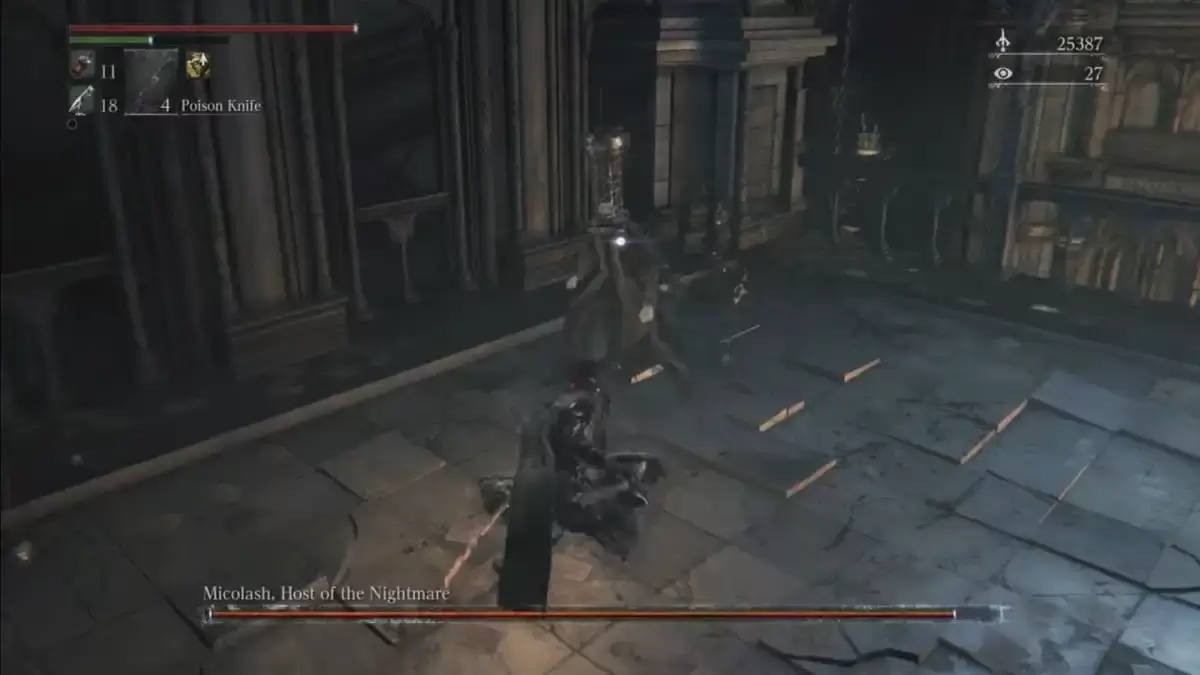 Image via FromSoftware
Area: Nightmare of Mensis
Micolash requires chasing him around his arena, dealing with his fog and summoned underlings. Once cornered, watch out for his potent attacks; poison knives are a common strategy.
The Old Hunters Bosses
The Old Hunters DLC bosses follow a linear progression. After Ludwig, use Laurence's Skull at the Eye Pendant location to fight Laurence. Then, face the Living Failures, Lady Maria, and the Orphan of Kos, all of which are tough encounters.
Ebrietas, Daughter of the Cosmos (Optional)
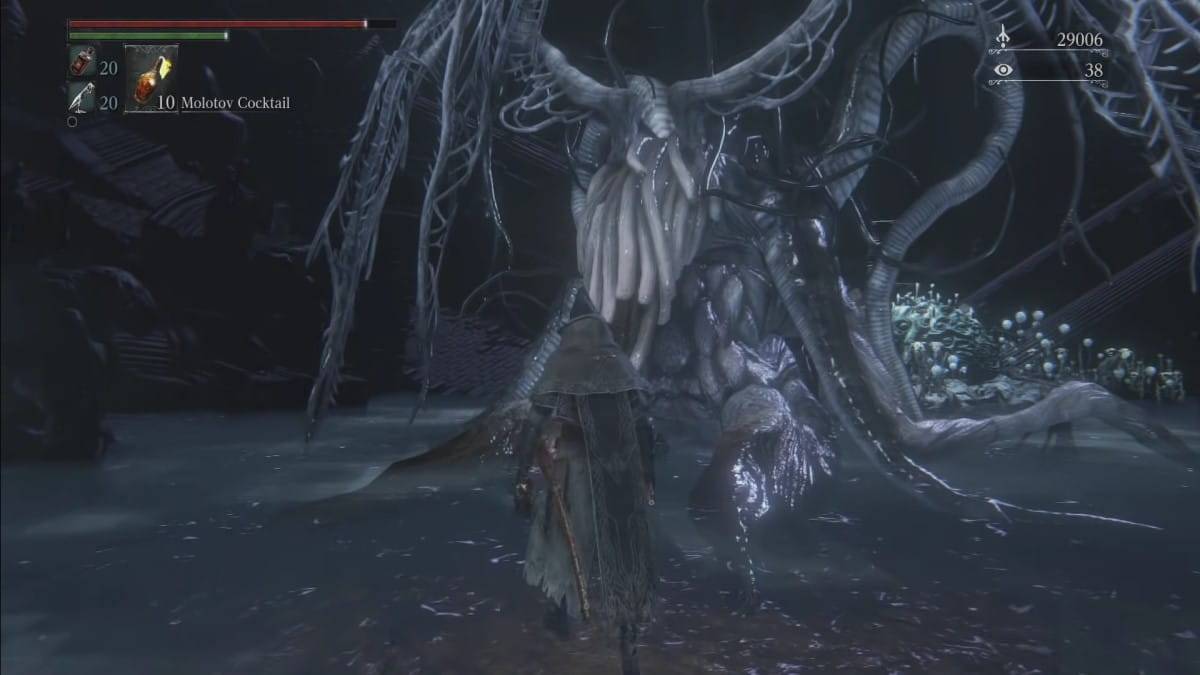 Image via FromSoftware
Area: Altar of Despair
Ebrietas uses tentacle and magical attacks. Be wary when she slams her head on the ground, as it deals massive damage.
Mergo’s Wet Nurse
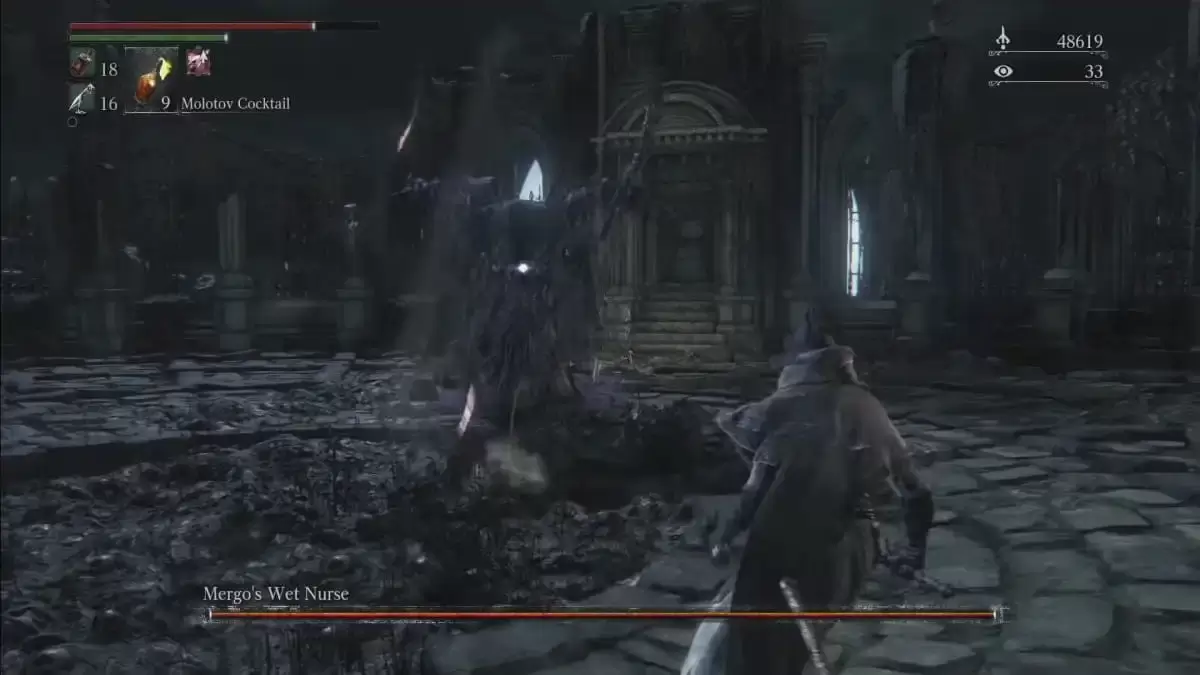 Image via FromSoftware
Area: Nightmare of Mensis
Mergo's Wet Nurse uses tentacles and a fast-moving water projectile, with fog obscuring vision later in the fight. Focus on evasion during these moments.
After defeating Mergo, complete any remaining tasks before proceeding to the endgame, including the DLC if not done.
Gehrman, the First Hunter
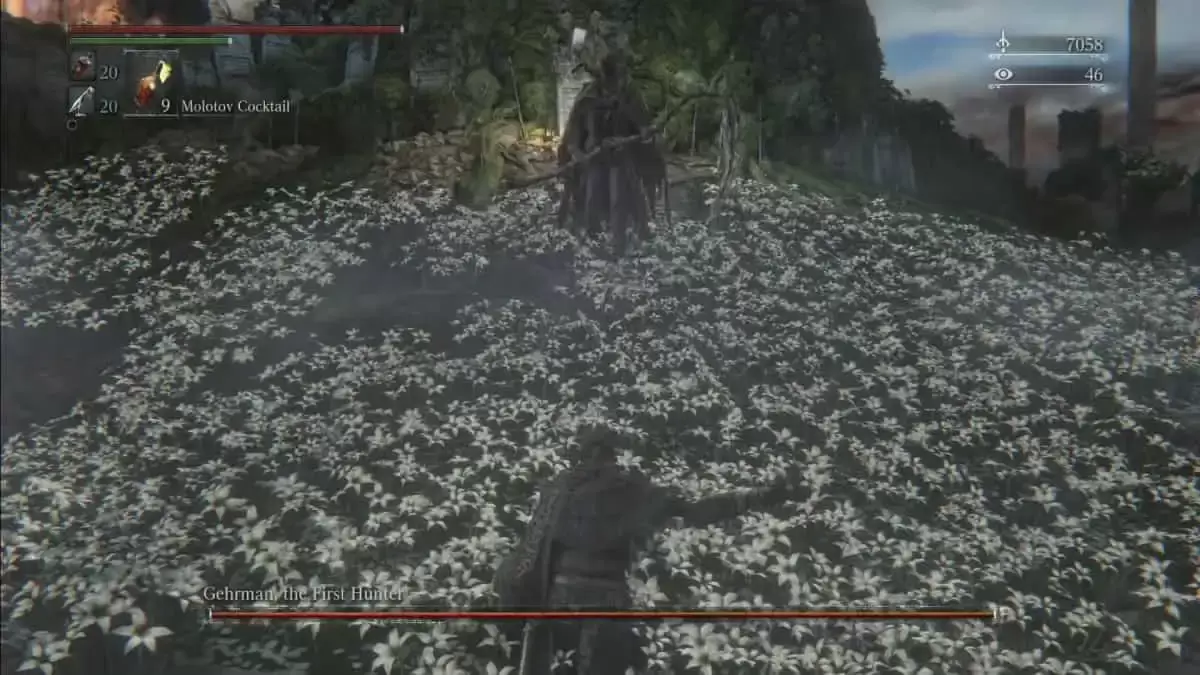 Image via FromSoftware
Area: Hunter’s Dream
Gehrman, the final non-optional boss, uses a scythe and firearms. Mastering parry timings can ease this fight significantly.
Moon Presence (Ending Specific)
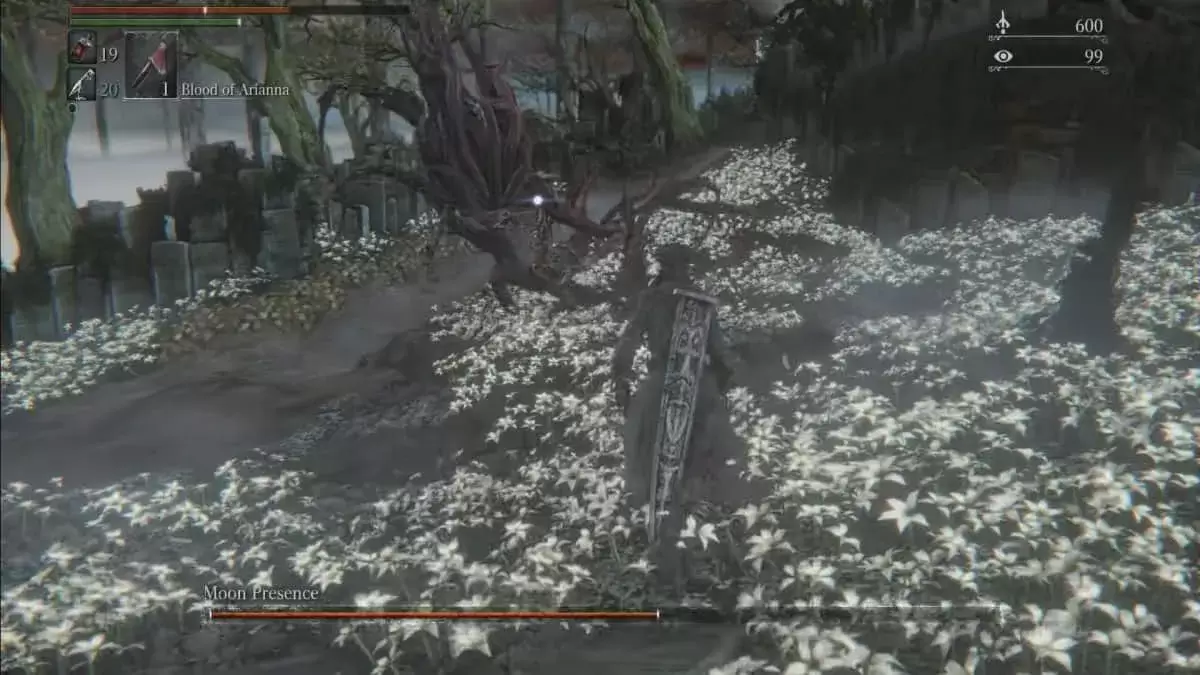 Image via FromSoftware
Area: Hunter’s Dream
To fight the Moon Presence, collect three of the four One Third of Umbilical Cords before facing Gehrman, and refuse his offer. The Moon Presence's attacks include tail swipes, claw strikes, and dark orbs, but with caution and learned skills, this fight is manageable.
This comprehensive guide to Bloodborne boss order will help you navigate through Yharnam's challenges effectively. For more updates on Bloodborne, explore Bloodborne PSX, a fan-made PS1 demake, and stay tuned for FromSoftware's latest, including Armored Core VI.
Related: How to Access the Hunter’s Nightmare for Bloodborne DLC on Attack of the Fanboy
Update: This article was updated on 2/3/2025 by Escapist Editorial to include more information about the various bosses, provide a high-level summary of the boss order, and to include the bosses from the Old Hunters DLC.
Latest Articles

Minion Rush Adds Endless Runner Mode in Major Update
Gameloft has launched a major update for Minion Rush: Running Game, introducing significant improvements both behind the scenes and in gameplay. The game now runs on a new engine, includes fresh features, and offers updated ways to play.What Changes

Mobirix Launches Cute Cat Merge Game: Merge Cat Town
- Merge Cat Town: Mobirix's charming new puzzle game brings feline fun- Combine items to restore and upgrade your cuddly cats' island paradise- Expand your village by welcoming new feline friends and structuresThe match-merge genre has seen countless

Stickman RPG Opens Pre-registration
Hero Stickman is now available for pre-registration on Google Play, and it's anything but your typical RPG. Featured in Google Play's Pre-Registration section, this game promises an experience worth your attention.You'll lead a team of Stickman Warri

Pokémon TCG Pocket Launches Ultra Beast Event
The latest Pokémon TCG Pocket Mass Outbreak event has begunThe Ultra Beasts return to center stageComplete challenges or use Wonder Pick to fill collection gaps or obtain new cardsPokémon TCG Pocket players were thrilled by the recent Extradimensiona
Destiny: Rising Available For Pre-Download Before Launch
Pre-downloads are now available globally, with over 10 million players already pre-registeredEarly access rewards include 200 free draws, exotic weapons, and special Destiny 2 crossover emblemsMobile version features Raids, Strikes, roguelike modes,

PUBG Mobile kicks off Friend Fest event and busts a Guinness World Record in the process
Fortnite has achieved a Guinness World Record, but not for what you might expectThis is part of the hybrid Friend Fest event happening until February 16thJoin Fortnite now to take part, or look for events near youFortnite, the mobile version of the p
Latest Games

Jackpot Slot Game
Card丨4.00M


Best Casino
Card丨9.40M

Super City: Building Master
Puzzle丨182.00M

Pocket Tales
Puzzle丨35.10M


Alien Invasion Mod
Action丨123.60M

Toca Boca World
Puzzle丨597.60M


Top News
MORE +

01
01-16
Zenless Zone Zero Confirms Version 1.5 Special Program Livestream Date and Time
SummaryZenless Zone Zero revealed the start date for Version 1.5 "Astra-nomical Moment" on January 10 at 19:30 (UTC+8).Version 1.5 plans to add S-Rank characters Astra Yao and Evelyn Chevalier.Not much else is known about Version 1.5, though recent leaks have teased plenty of new content and events
02
01-21
Final Fantasy Updates Fix Controller Glitch
Patches for Final Fantasy VII Remake are now available on Steam, the Epic Games Store, and PlayStation 5. This update resolves issues with controller vibration motors. The game follows Cloud Strife, a former SOLDIER, as he joins Avalanche to prevent Shinra Electric Power Company from destroying th
03
04-18
"Jurassic World Rebirth Trailer Unveils Dinosaur Chaos Before Summer Release"
Jurassic World Rebirth made a roaring entrance during Super Bowl Sunday with a special trailer that showcased even more dinosaur action in anticipation of its July 2025 premiere. The latest footage features stars Scarlett Johansson and Mahershala Ali, who initially capture the audience's attention b
04
12-12
Immersive Adventure Awaits in 'In the Turquoise Moonglow' Update for Wuthering Waves
Wuthering Waves Version 1.2 Update: A Sneak Peek at "In the Turquoise Moonglow"
Get ready, Wuthering Waves players! Kuro Games is launching Phase One of the highly anticipated Version 1.2 update on August 15th. A new trailer reveals exciting additions, including a fresh Resonator, new weapons, ques
05
04-24
"Dune: Awakening Delay Extended by Three Weeks for Beta-Inspired Changes"
Dune: Awakening, the highly anticipated open-world survival MMO inspired by Frank Herbert's iconic sci-fi novels and Denis Villeneuve's films, has been pushed back to a new release date of June 10, 2025. Funcom, the game's developer, announced this delay alongside an exciting early access opportunit
Topics
More +