Top 16 Warding Tactics by Pros in Dota 2's New Patch
Author : Eleanor
Apr 04,2025
In the dynamic world of Dota 2, mastering vision control remains a critical component of success. With each new patch, players must adapt their strategies, and the art of warding has become a focal point of innovation. Recently, Adrian, a renowned guide creator, shared a detailed video on his YouTube channel, highlighting the latest warding techniques utilized by professional players at DreamLeague S25. At PC Gamer, we've delved into these strategies, analyzing their effectiveness and offering alternative placements to enhance your gameplay.
As the Dota 2 community navigates the latest patch, professional teams continue to push the envelope with Observer ward placements. These strategic positions are not chosen at random but are meticulously planned to maximize utility while minimizing the risk of being spotted. Below, we showcase 16 of the most innovative ward placements currently in use by top-tier players, along with our in-depth analysis and alternative suggestions.
Table of Contents:
- Mid Lane Jungle Extension
- Radiant Ancient Riverbank
- Dire Top Tier 2 Bushes
- Radiant Bottom Secret Shop Monitor
- Dire Bottom Tier 2 Fog Corner
- Radiant Roshan Pit Entrance
- Dire Mid Lane High Ground
- Radiant Top Tier 2 Backdoor Path
- Dire Bottom Ancient River Bend
- Radiant Mid Lane Jungle Passage
- Dire Top Secret Shop Approach
- Radiant Bottom Tier 3 Side Path
- Dire Roshan Pit Exit
- Radiant Top Ancient Cliffside
- Dire Mid Lane Jungle Overlook
- Radiant Bottom Tier 2 Rear Flank
Mid Lane Jungle Extension
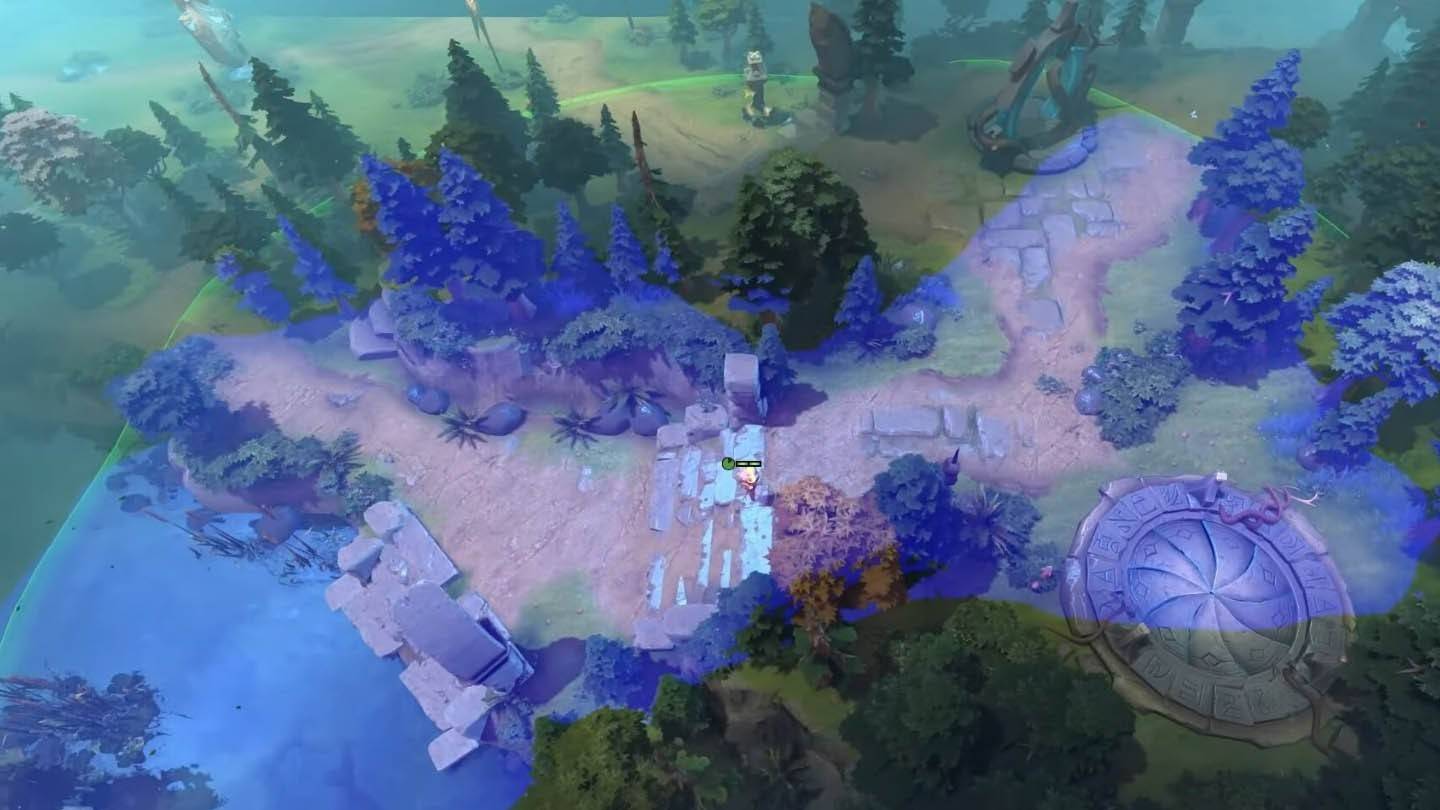 Image: ensigame.com
Early Game Domination: Positioned slightly deeper than traditional mid lane jungle wards, this placement provides exceptional vision over key areas early in the game. It not only aids in securing runes but also offers vital insight into enemy movements through the jungle. Alternative: A slight shift towards the Radiant side can provide additional coverage of the secret shop approach.
Radiant Ancient Riverbank
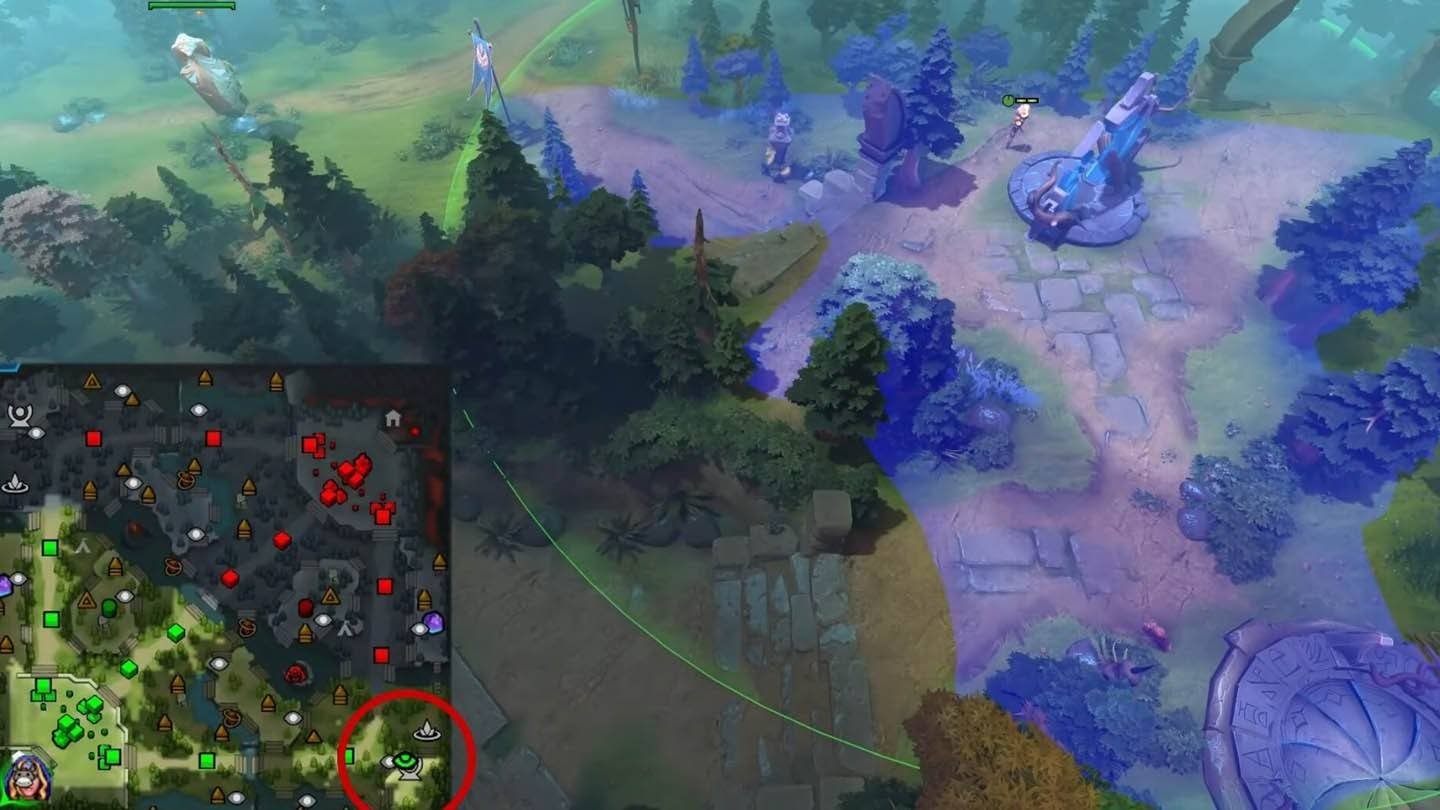 Image: ensigame.com
Strategic Depth: This cleverly placed ward offers deep vision into the Radiant's base from an unexpected angle. Its unconventional positioning makes it harder for enemies to locate and destroy, ensuring prolonged effectiveness. Bonus Tip: Pairing this with a Sentry ward nearby can create a formidable defensive setup.
Dire Top Tier 2 Bushes
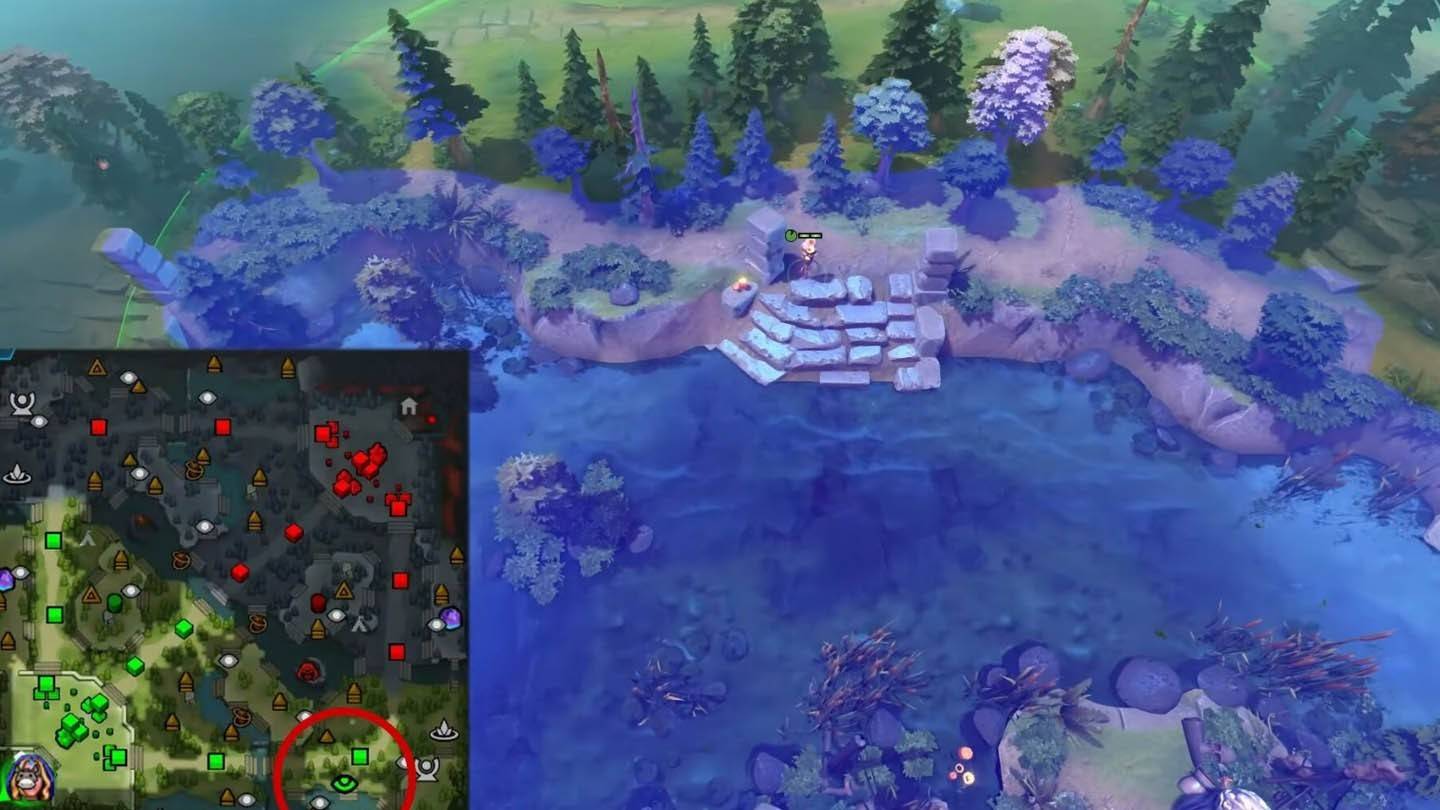 Image: ensigame.com
Tower Protection: By revealing critical areas around the Dire's second tier towers, this ward aids both defense and offensive positioning. It's particularly effective during teamfights near these structures. Pro Tip: Consider rotating this ward periodically to avoid predictable patterns.
Radiant Bottom Secret Shop Monitor
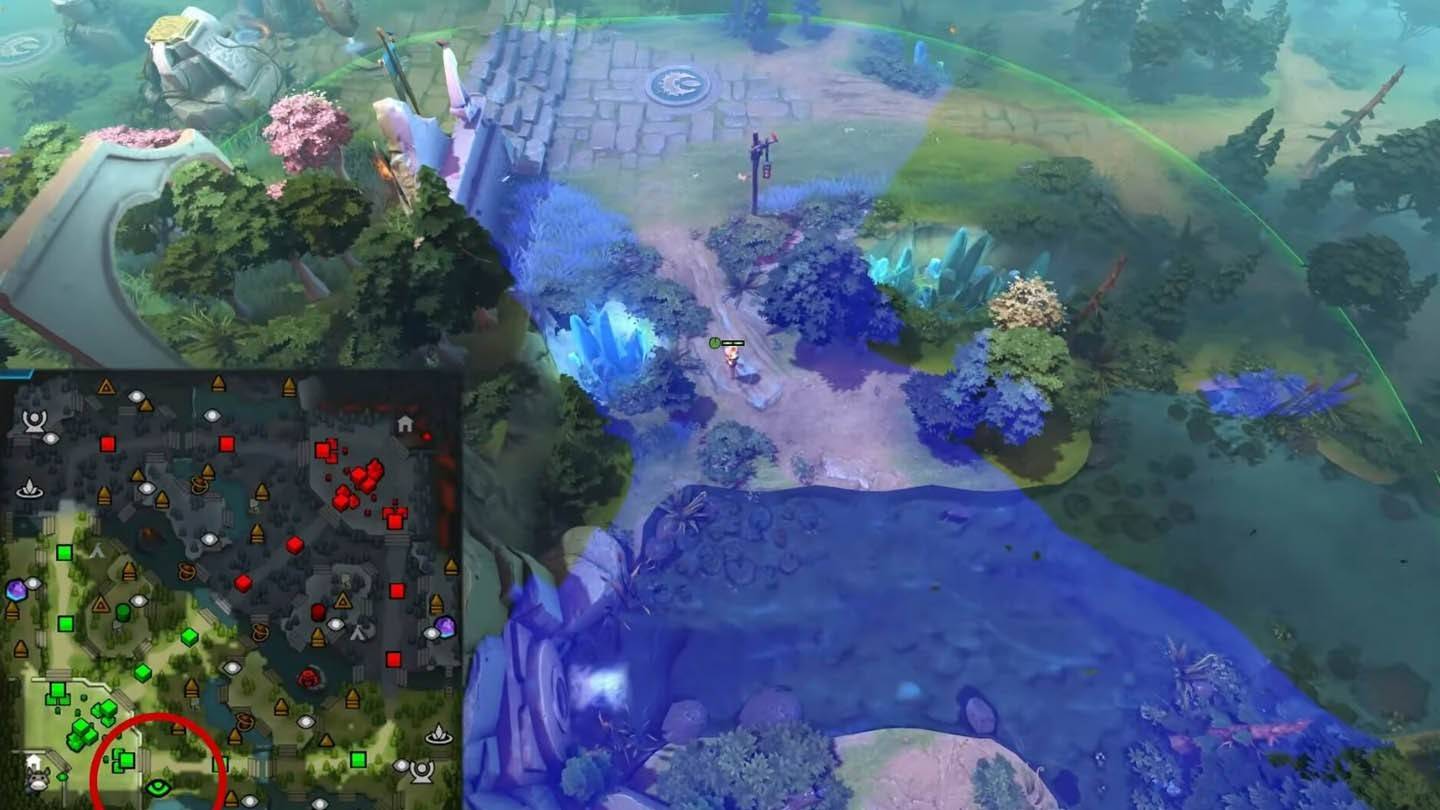 Image: ensigame.com
Economic Intelligence: This placement allows you to monitor enemy heroes using the secret shop, providing valuable information about item purchases and timing. Advanced Strategy: Combine this with vision denial wards to disrupt potential buybacks.
Dire Bottom Tier 2 Fog Corner
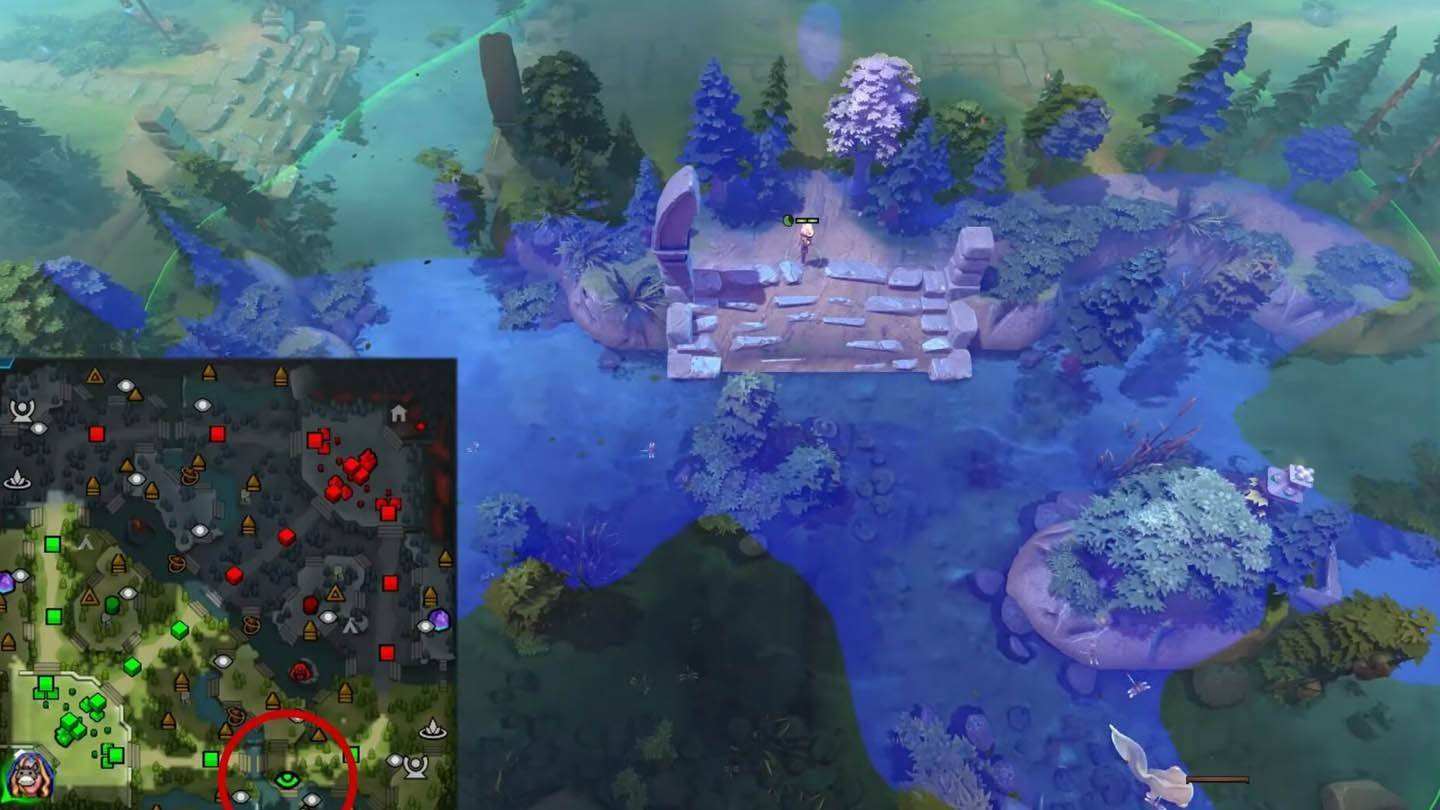 Image: ensigame.com
Ambush Preparation: Giving vision into foggy areas near the Dire's bottom tier two tower, this ward assists in setting up ganks and ambushes. Expert Advice: Use this ward in conjunction with smoke to execute surprise attacks.
Radiant Roshan Pit Entrance
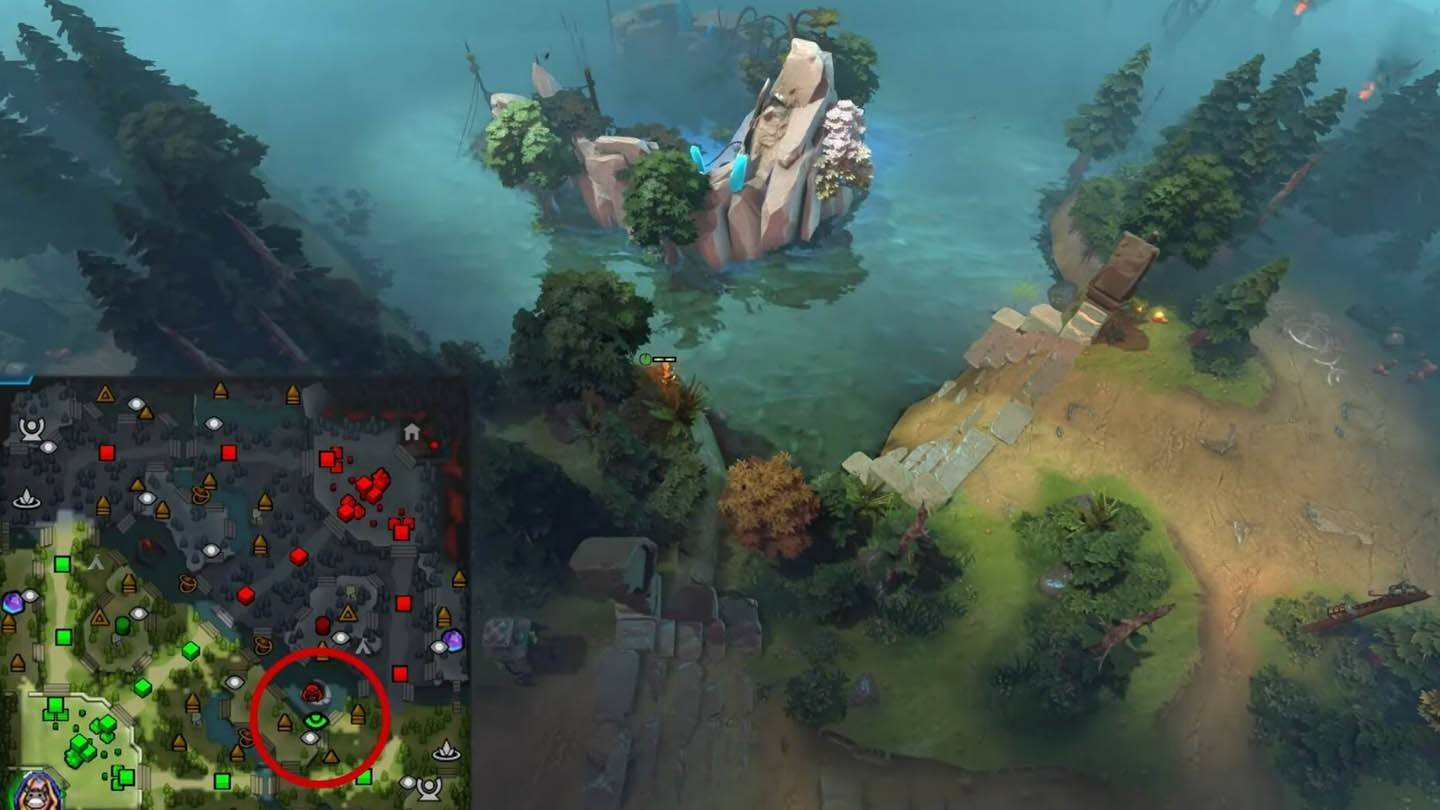 Image: ensigame.com
Timing is Everything: Enabling early detection of Roshan attempts from the Radiant side, this ward allows timely responses and potential counter-attacks. Tactical Insight: Rotate this ward frequently to maintain the element of surprise.
Dire Mid Lane High Ground
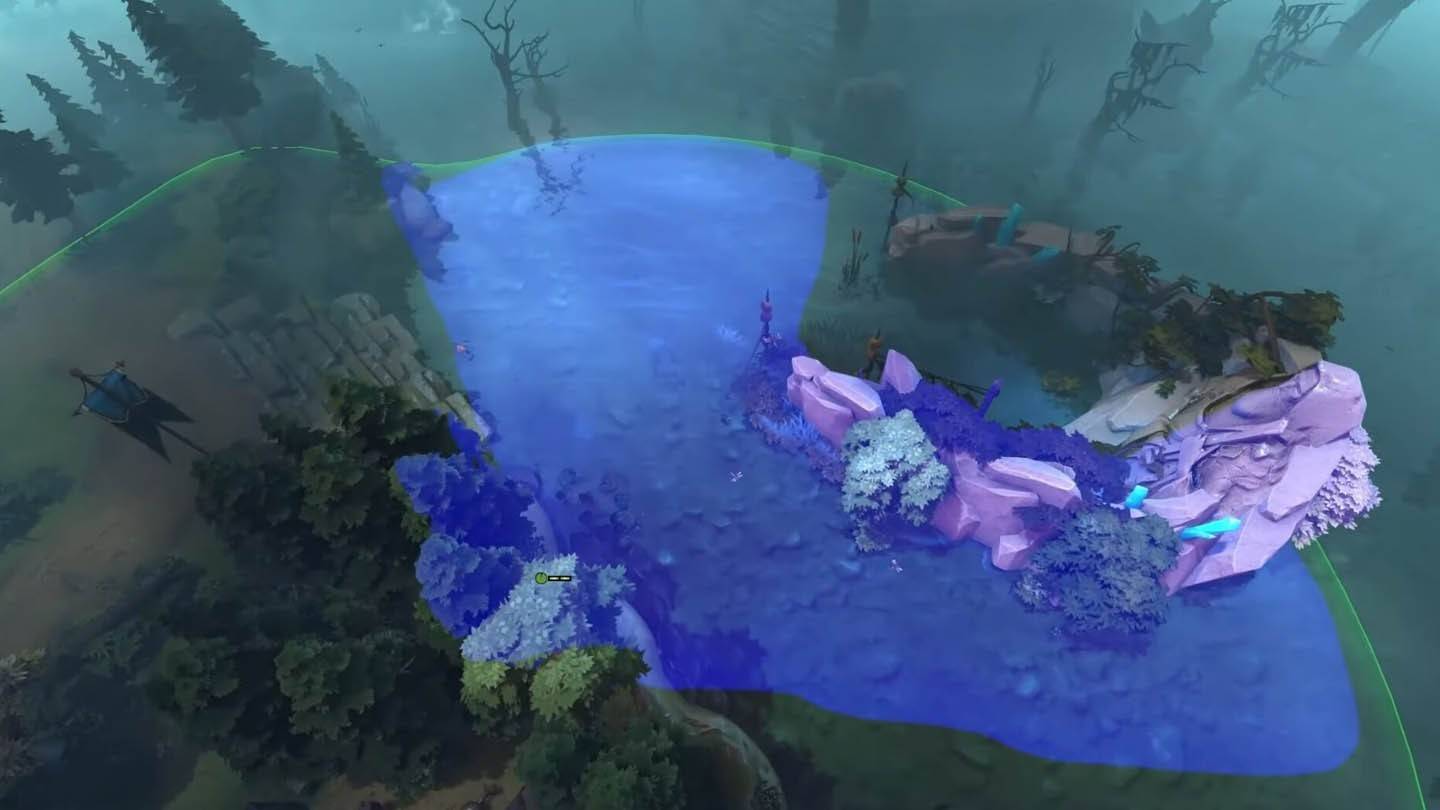 Image: ensigame.com
Elevated Awareness: Offering extended vision along the middle lane high ground, this ward improves awareness of approaching enemies. Strategic Note: Ideal for controlling the mid lane during crucial moments.
Radiant Top Tier 2 Backdoor Path
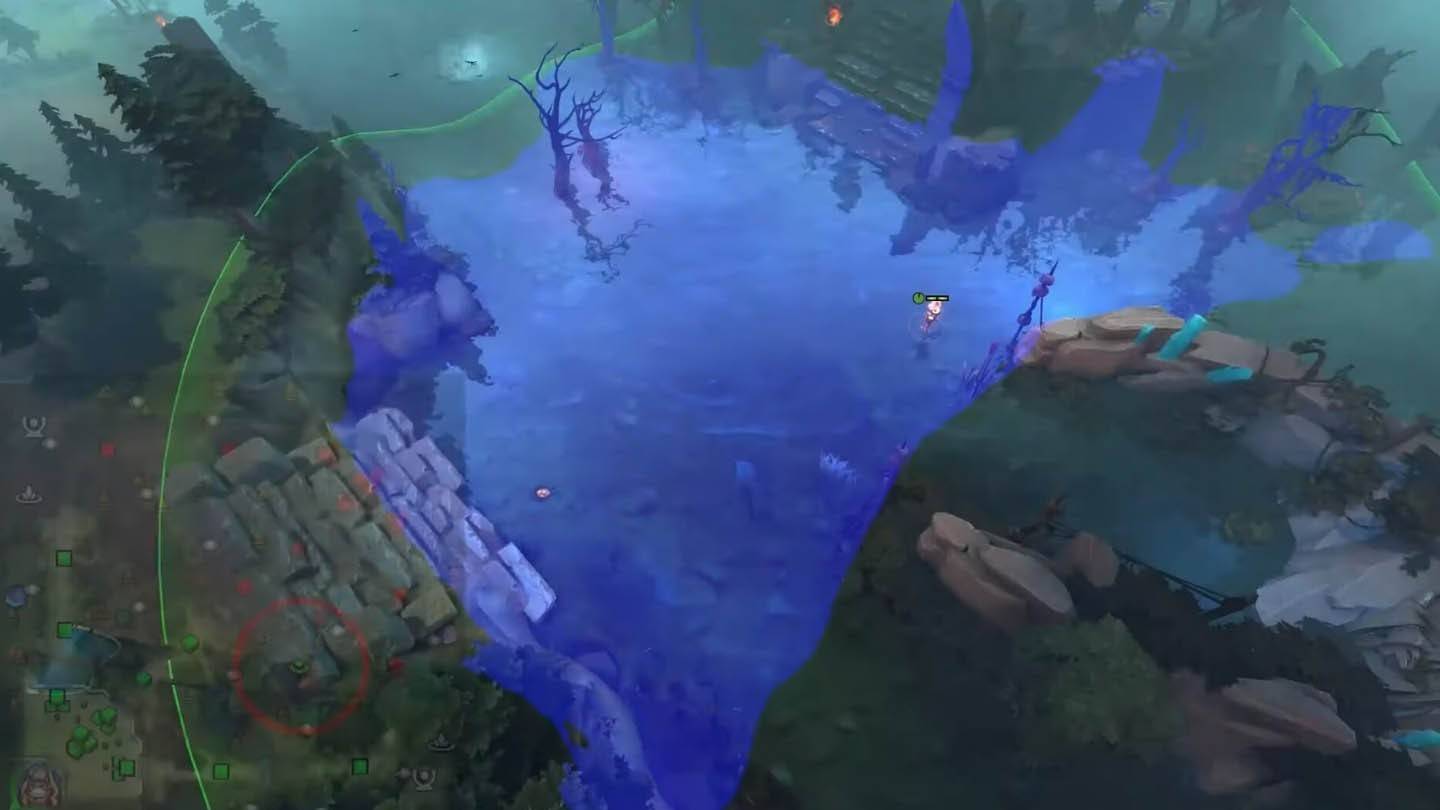 Image: ensigame.com
Security First: Monitoring backdoor paths leading to the Radiant's top tier two tower, this ward prevents surprise attacks. Defensive Tip: Place a Sentry ward nearby to catch sneaky invis heroes.
Dire Bottom Ancient River Bend
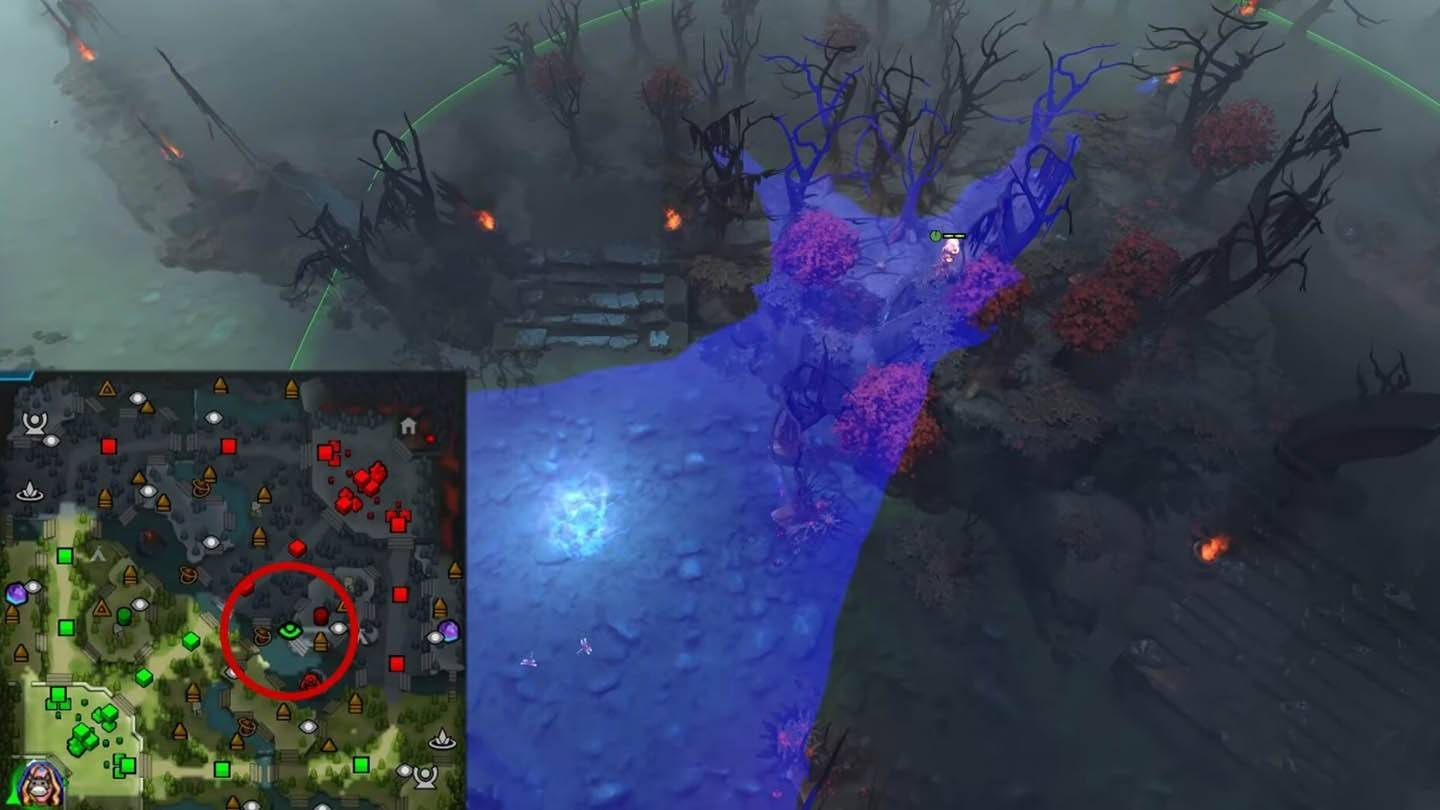 Image: ensigame.com
Deep Vision Mastery: Providing deep vision into the Dire's base through an unconventional river bend location, this ward exemplifies creative thinking. Advanced Placement: Experiment with slight adjustments to find optimal coverage.
Radiant Mid Lane Jungle Passage
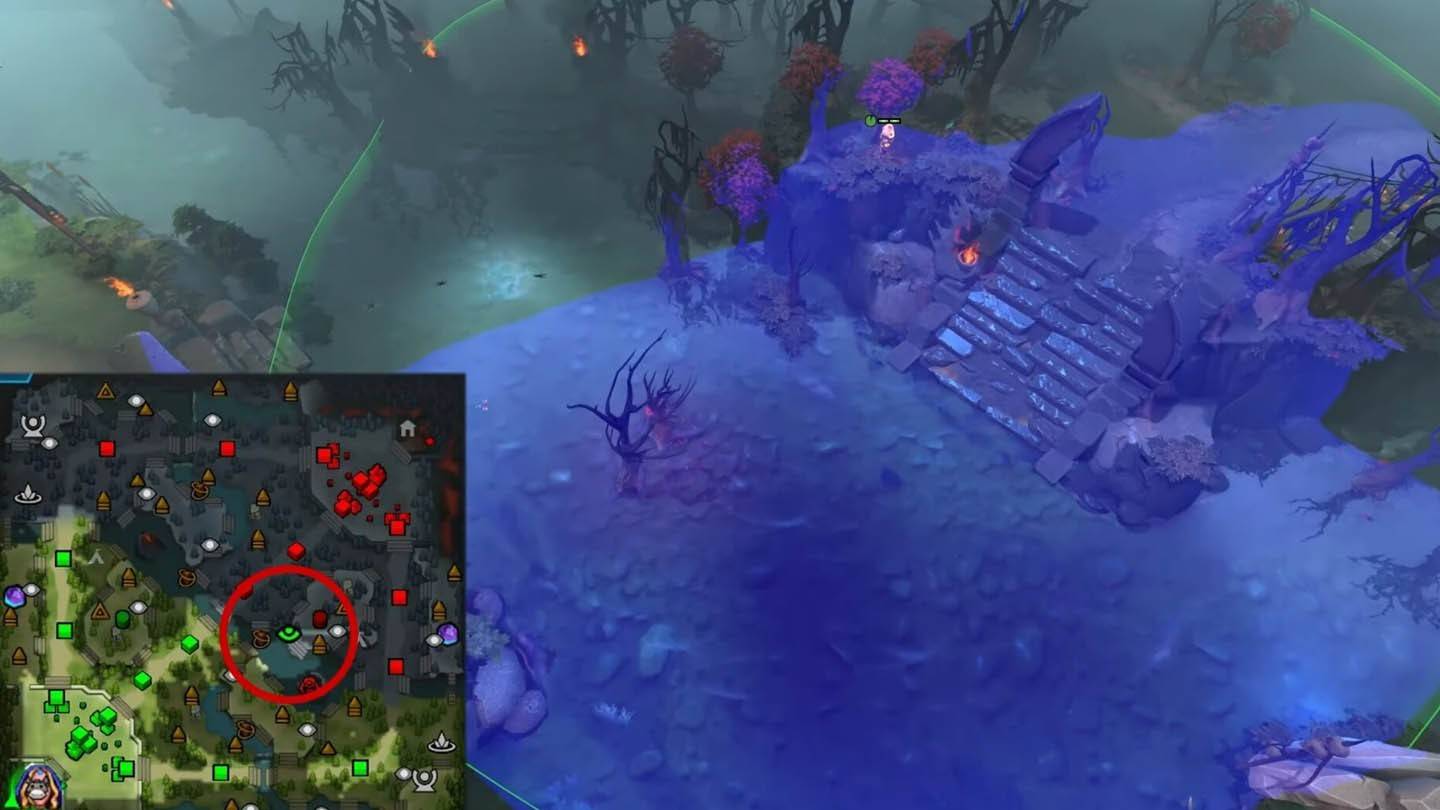 Image: ensigame.com
Comprehensive Coverage: Revealing key jungle passages adjacent to the mid lane, this ward enhances overall map awareness. Professional Recommendation: Rotate between different jungle entrances for maximum effect.
Dire Top Secret Shop Approach
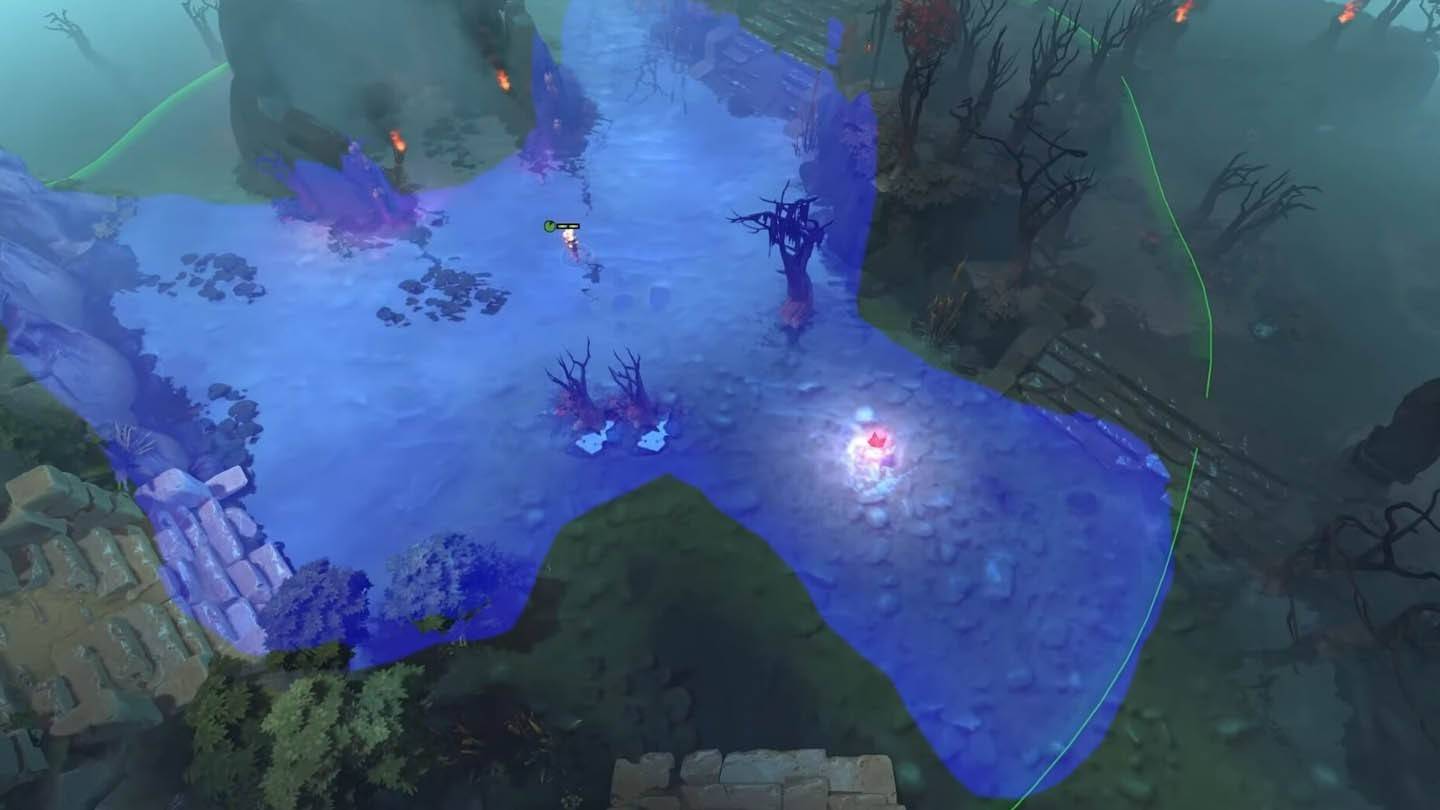 Image: ensigame.com
Economic Surveillance: Alerts when enemies are heading towards or leaving the Dire's secret shop area, offering economic intelligence. Competitive Edge: Use this information to time your pushes effectively.
Radiant Bottom Tier 3 Side Path
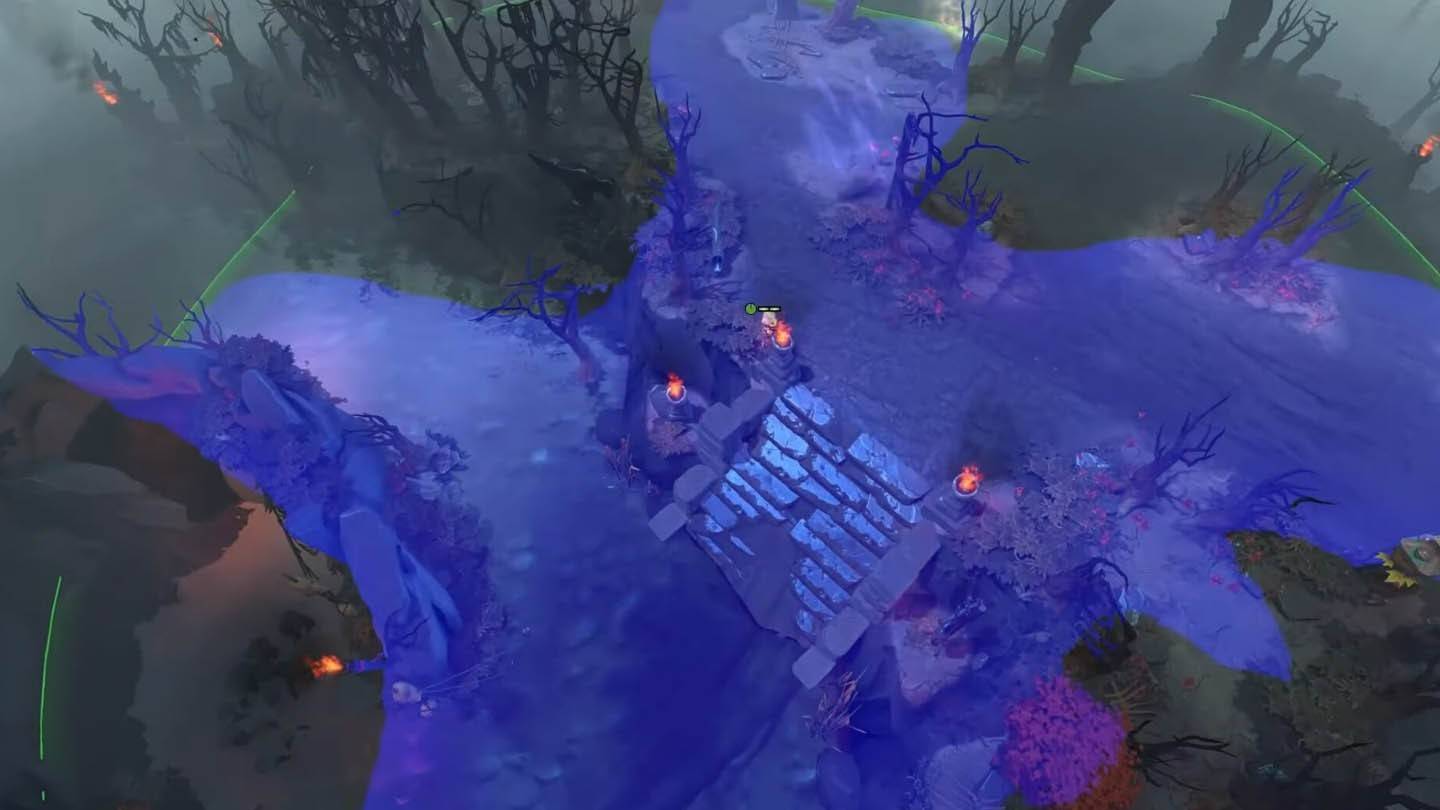 Image: ensigame.com
Flank Detection: Monitoring side paths leading to the Radiant's bottom tier three tower, this ward warns against flanking maneuvers. Team Coordination: Share this vision with your team for coordinated responses.
Dire Roshan Pit Exit
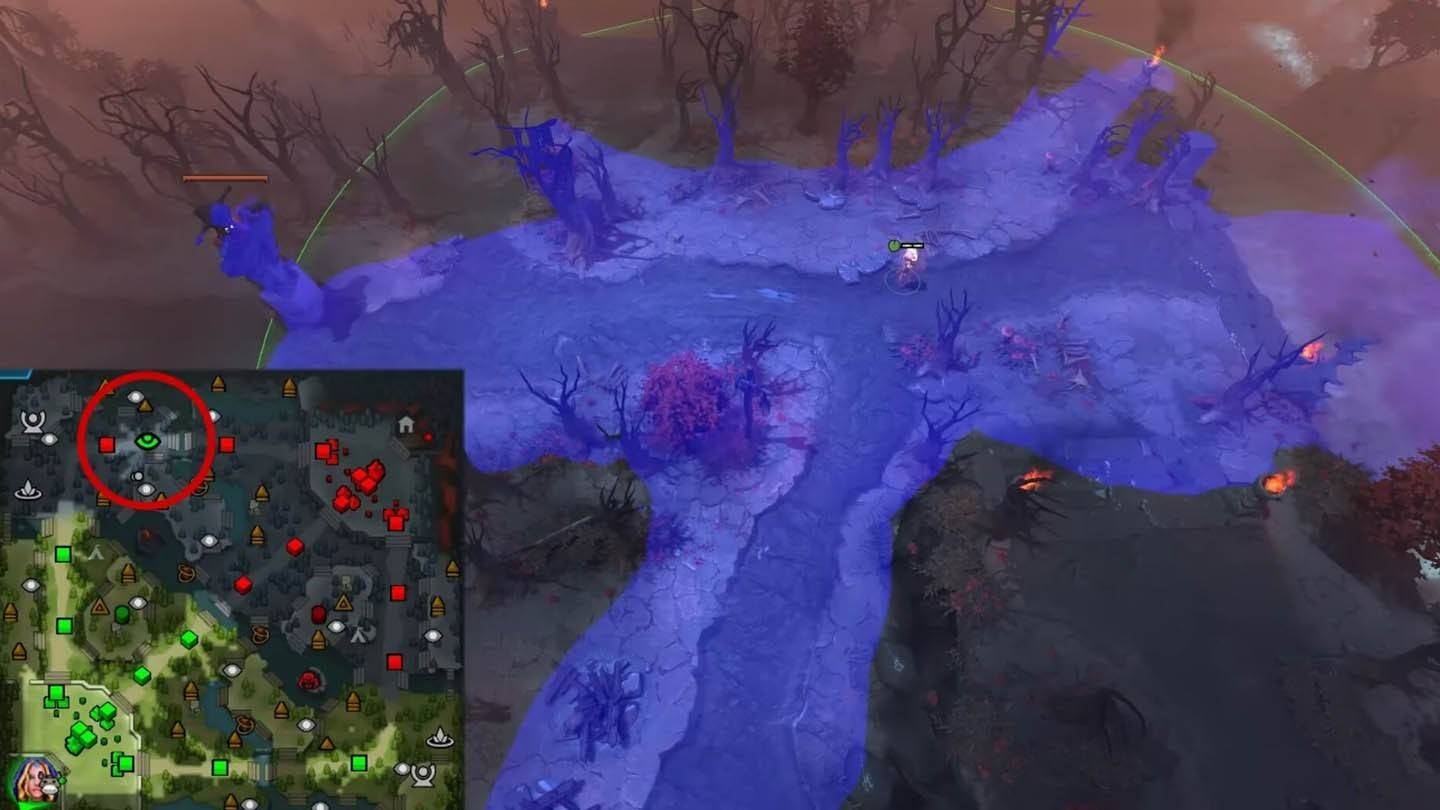 Image: ensigame.com
Counterplay Opportunity: Detects enemy movements exiting the Roshan pit from the Dire side, facilitating timely reactions. Strategic Positioning: Essential during late-game Roshan battles.
Radiant Top Ancient Cliffside
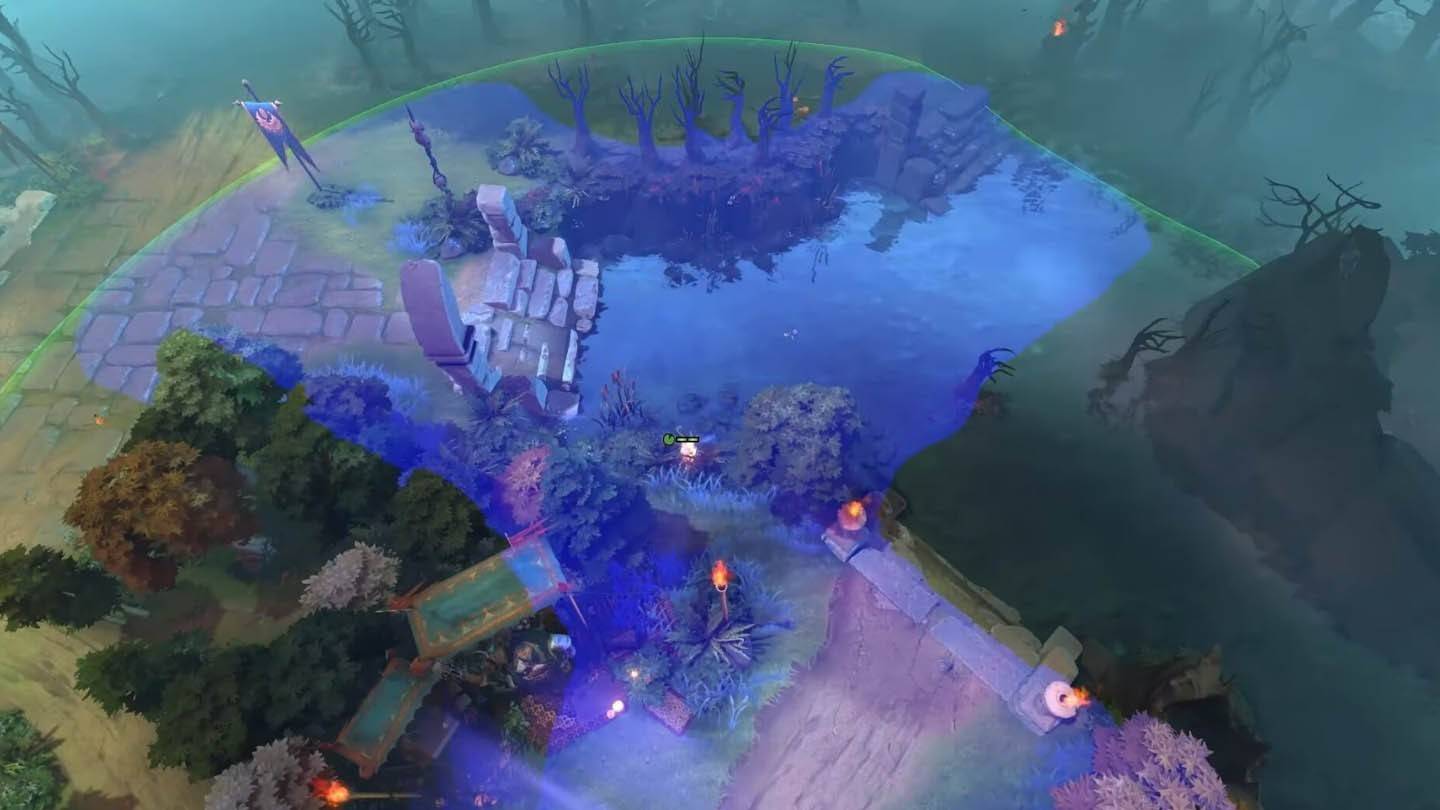 Image: ensigame.com
Hidden Vantage Point: Offers hidden vision into the Radiant's base from a cliffside vantage point, surprising opponents. Elite Placement: Requires precise execution for best results.
Dire Mid Lane Jungle Overlook
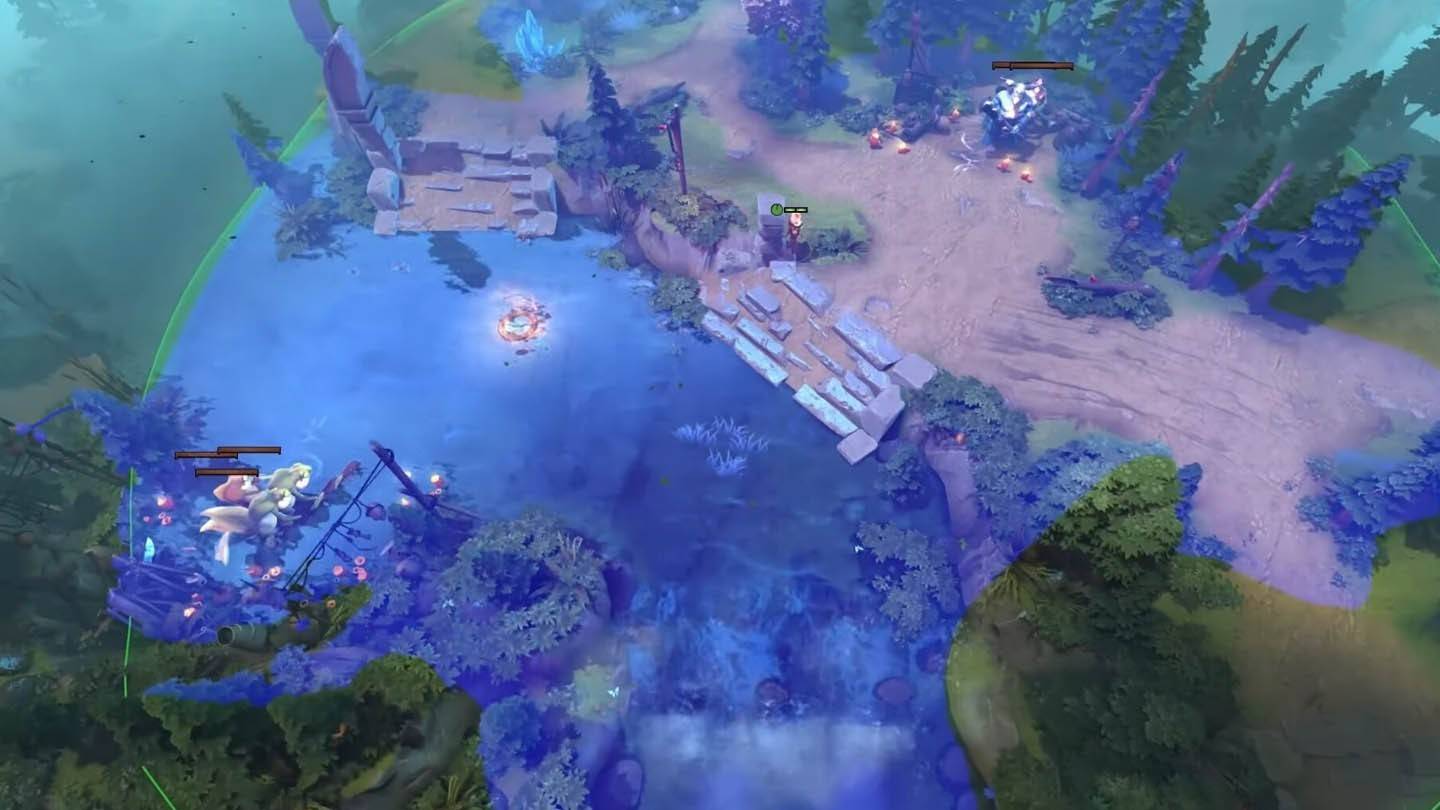 Image: ensigame.com
Elevated Advantage: Provides elevated vision over the Dire's mid lane jungle region, improving situational awareness. Advanced Technique: Combine with other mid lane wards for comprehensive coverage.
Radiant Bottom Tier 2 Rear Flank
 Image: ensigame.com
Preventive Measures: Monitors rear flanks near the Radiant's bottom tier two tower, preventing sneak attacks. Defensive Mastery: Critical for maintaining tower integrity.
These cutting-edge ward placements represent the pinnacle of professional vision control in Dota 2. By studying and implementing these strategies, you'll gain a significant advantage in both casual and competitive play. Remember, effective warding isn't just about placing observers - it's about understanding the nuances of map control and adapting to evolving situations.
Latest Articles
Minion Rush Adds Endless Runner Mode in Major Update
Gameloft has launched a major update for Minion Rush: Running Game, introducing significant improvements both behind the scenes and in gameplay. The game now runs on a new engine, includes fresh features, and offers updated ways to play.What Changes

Mobirix Launches Cute Cat Merge Game: Merge Cat Town
- Merge Cat Town: Mobirix's charming new puzzle game brings feline fun- Combine items to restore and upgrade your cuddly cats' island paradise- Expand your village by welcoming new feline friends and structuresThe match-merge genre has seen countless

Stickman RPG Opens Pre-registration
Hero Stickman is now available for pre-registration on Google Play, and it's anything but your typical RPG. Featured in Google Play's Pre-Registration section, this game promises an experience worth your attention.You'll lead a team of Stickman Warri
Pokémon TCG Pocket Launches Ultra Beast Event
The latest Pokémon TCG Pocket Mass Outbreak event has begunThe Ultra Beasts return to center stageComplete challenges or use Wonder Pick to fill collection gaps or obtain new cardsPokémon TCG Pocket players were thrilled by the recent Extradimensiona
Destiny: Rising Available For Pre-Download Before Launch
Pre-downloads are now available globally, with over 10 million players already pre-registeredEarly access rewards include 200 free draws, exotic weapons, and special Destiny 2 crossover emblemsMobile version features Raids, Strikes, roguelike modes,

PUBG Mobile kicks off Friend Fest event and busts a Guinness World Record in the process
Fortnite has achieved a Guinness World Record, but not for what you might expectThis is part of the hybrid Friend Fest event happening until February 16thJoin Fortnite now to take part, or look for events near youFortnite, the mobile version of the p
Latest Games

Jackpot Slot Game
Card丨4.00M


Best Casino
Card丨9.40M

Super City: Building Master
Puzzle丨182.00M

Pocket Tales
Puzzle丨35.10M


Alien Invasion Mod
Action丨123.60M

Toca Boca World
Puzzle丨597.60M


Top News
MORE +


01
01-16
Zenless Zone Zero Confirms Version 1.5 Special Program Livestream Date and Time
SummaryZenless Zone Zero revealed the start date for Version 1.5 "Astra-nomical Moment" on January 10 at 19:30 (UTC+8).Version 1.5 plans to add S-Rank characters Astra Yao and Evelyn Chevalier.Not much else is known about Version 1.5, though recent leaks have teased plenty of new content and events
02
01-21
Final Fantasy Updates Fix Controller Glitch
Patches for Final Fantasy VII Remake are now available on Steam, the Epic Games Store, and PlayStation 5. This update resolves issues with controller vibration motors. The game follows Cloud Strife, a former SOLDIER, as he joins Avalanche to prevent Shinra Electric Power Company from destroying th
03
04-18
"Jurassic World Rebirth Trailer Unveils Dinosaur Chaos Before Summer Release"
Jurassic World Rebirth made a roaring entrance during Super Bowl Sunday with a special trailer that showcased even more dinosaur action in anticipation of its July 2025 premiere. The latest footage features stars Scarlett Johansson and Mahershala Ali, who initially capture the audience's attention b
04
12-12
Immersive Adventure Awaits in 'In the Turquoise Moonglow' Update for Wuthering Waves
Wuthering Waves Version 1.2 Update: A Sneak Peek at "In the Turquoise Moonglow"
Get ready, Wuthering Waves players! Kuro Games is launching Phase One of the highly anticipated Version 1.2 update on August 15th. A new trailer reveals exciting additions, including a fresh Resonator, new weapons, ques
05
04-24
"Dune: Awakening Delay Extended by Three Weeks for Beta-Inspired Changes"
Dune: Awakening, the highly anticipated open-world survival MMO inspired by Frank Herbert's iconic sci-fi novels and Denis Villeneuve's films, has been pushed back to a new release date of June 10, 2025. Funcom, the game's developer, announced this delay alongside an exciting early access opportunit
Topics
More +